
Summary
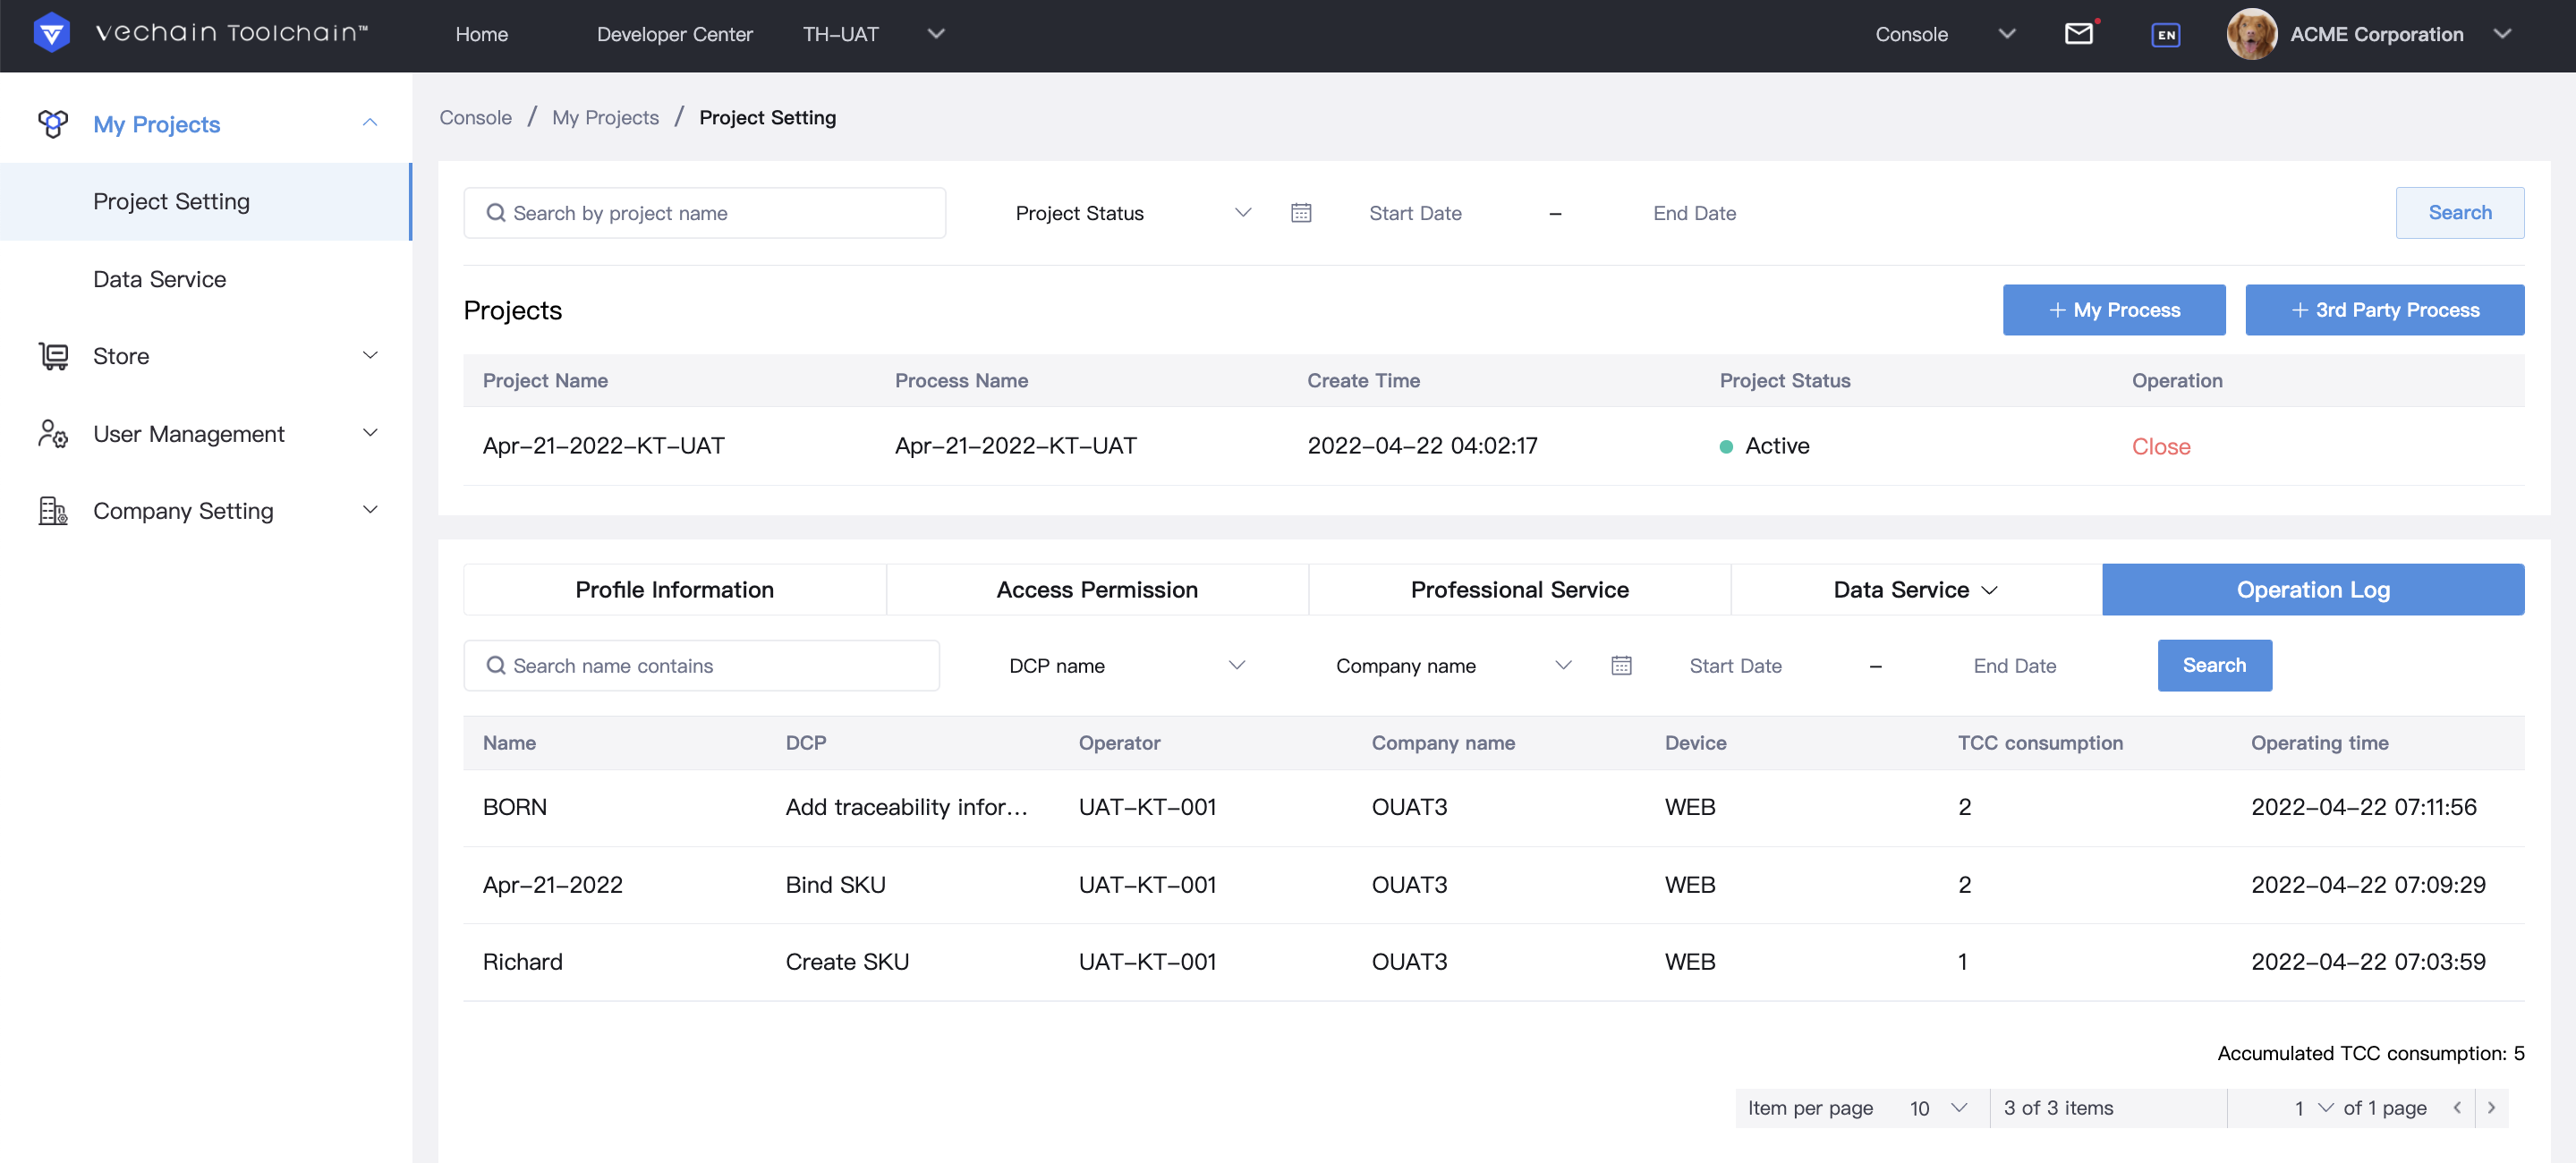
You can manage your Project Setting through <Console> -- <Project Setting>:
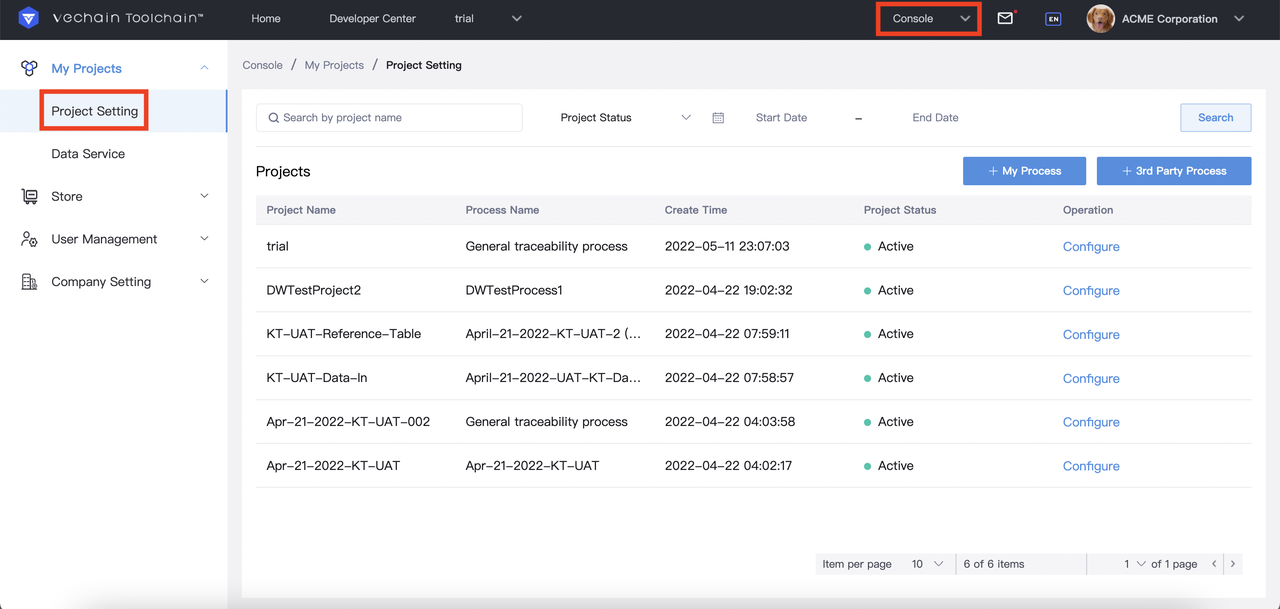
To enter a project, use the drop-down menu at the top navigation bar:
We recommend the Administrator to manage Project Setting. Both Administrator/Operators can operate on projects.
Process Selection
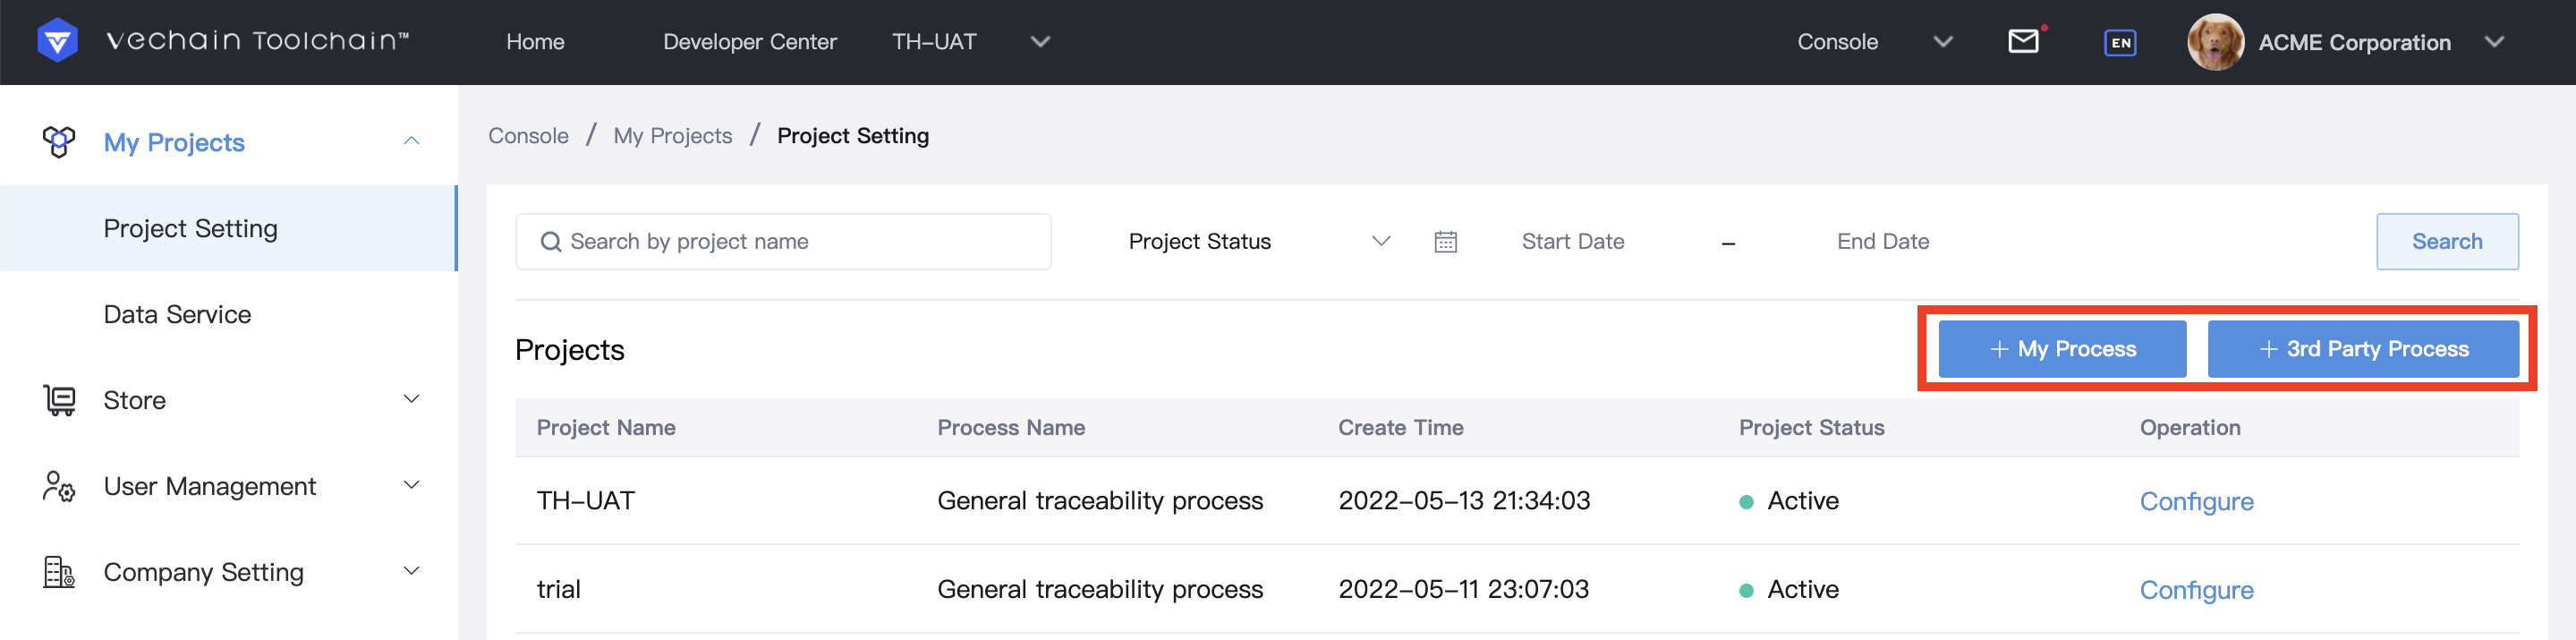
When creating a new project, you can select a process from <My Process> or <3rd Party Process> based on your business needs (as shown below).
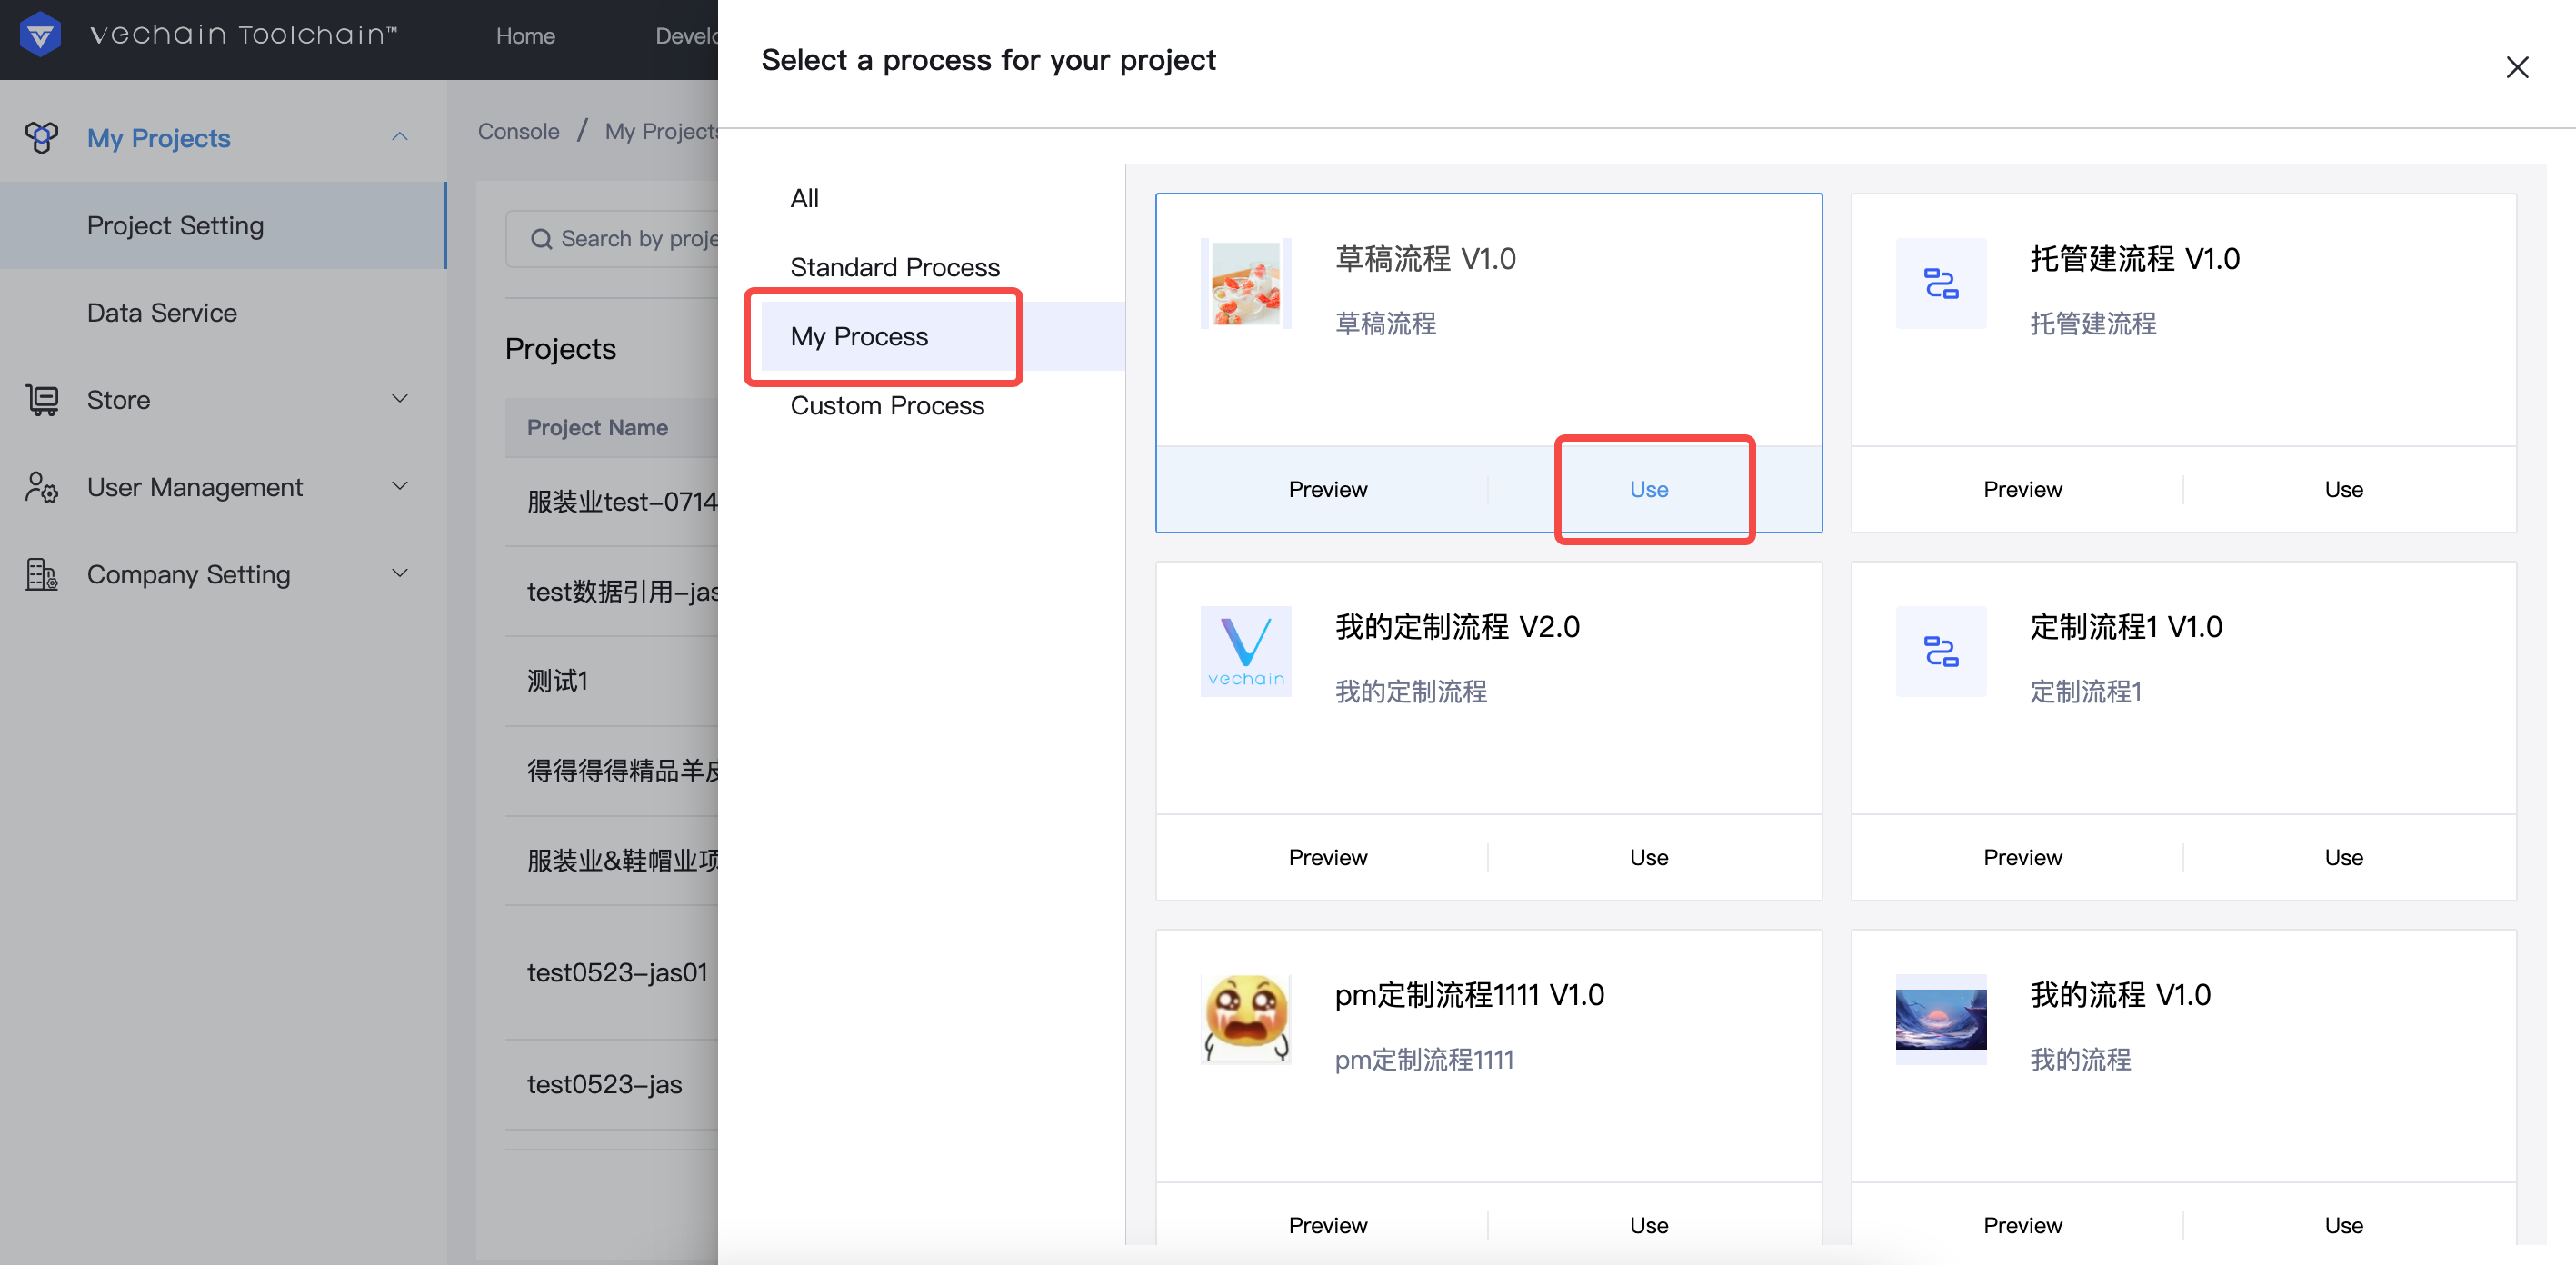
- My Process
The process templates <My Process> are customized templates created in the <Process Builder>. If <3rd Party Process> cannot meet your business needs, you can use <Process Builder> to build a process that matches your actual production line. After you submit your customized process, you will be able to view and use it in <My Process>.
Note: You can only create projects with <My Process> if you have a PaaS subscription.
- Standard Process
<Standard Process> provides a set of pre-defined templates designed for different industries. These standard processes are defined by our service provider DNV. Here you can also find the General Traceability template, a standardized traceability process template developed by VeChain based on their long-term experience with enterprise customers in different industry verticals.
In <Standard Process>, you can select a standard process suitable for your business, or you can choose a process customized by your partner companies, and apply the process directly to your project.
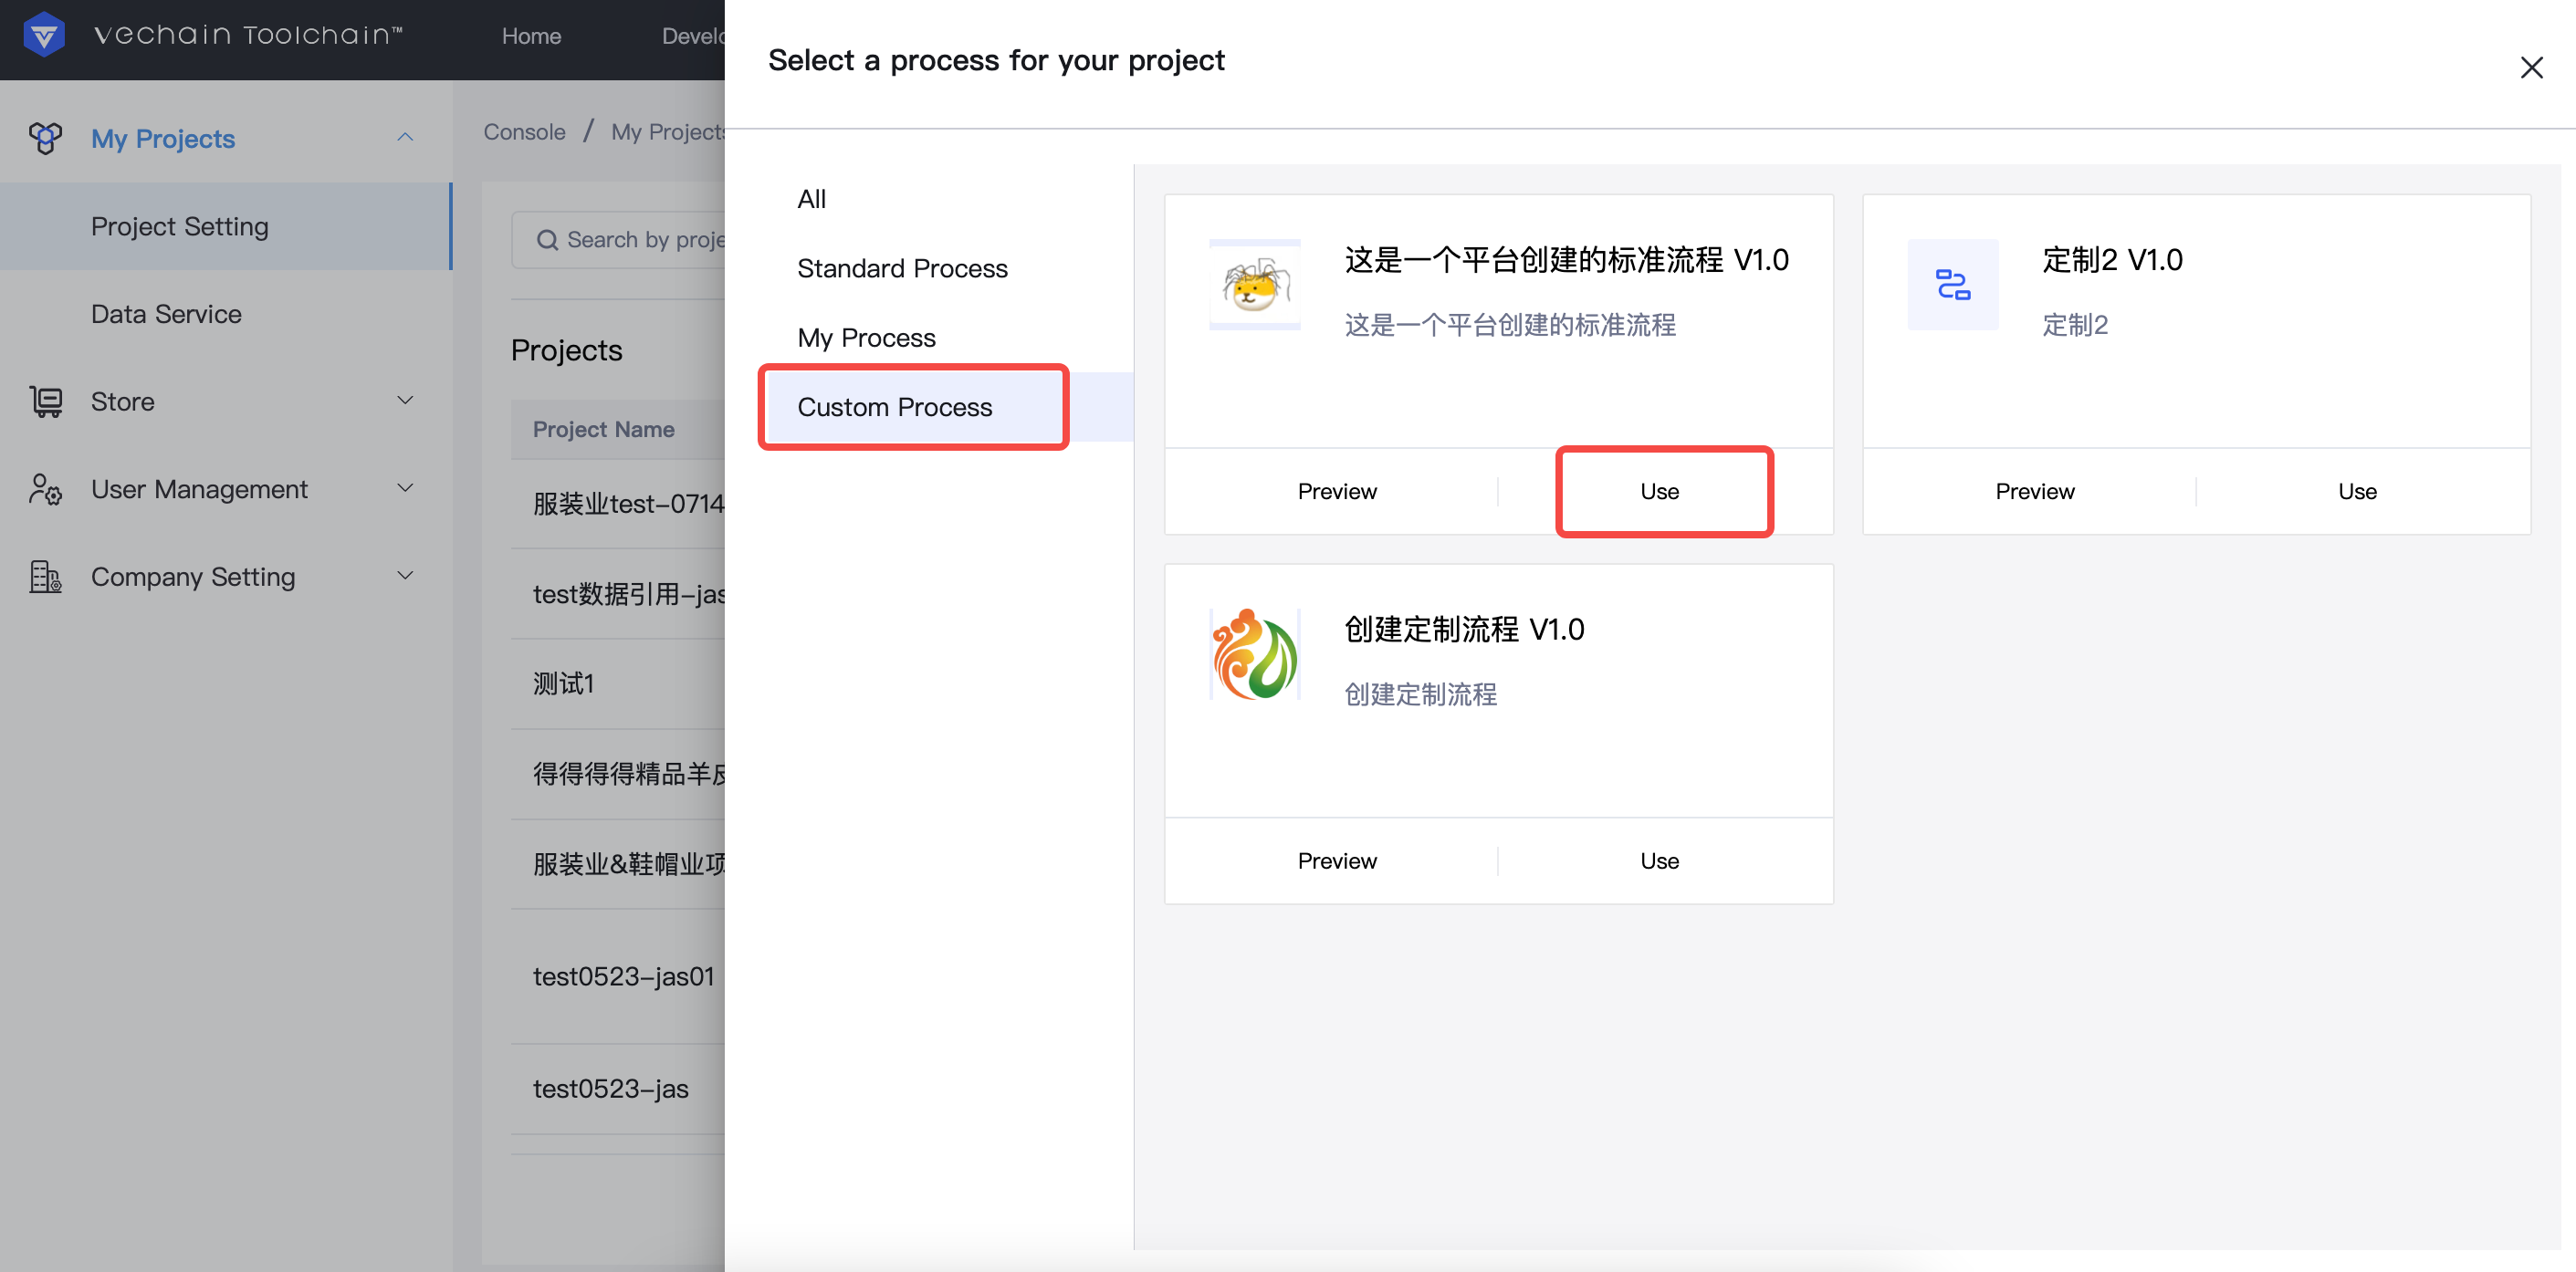
- Custom Process
When current processes do not meet the business scenarios, the enterprise can ask service providers to customize the process for a certain industry field based on their professional industry experience. Additional charges apply for <Custom Process>.
Create Project
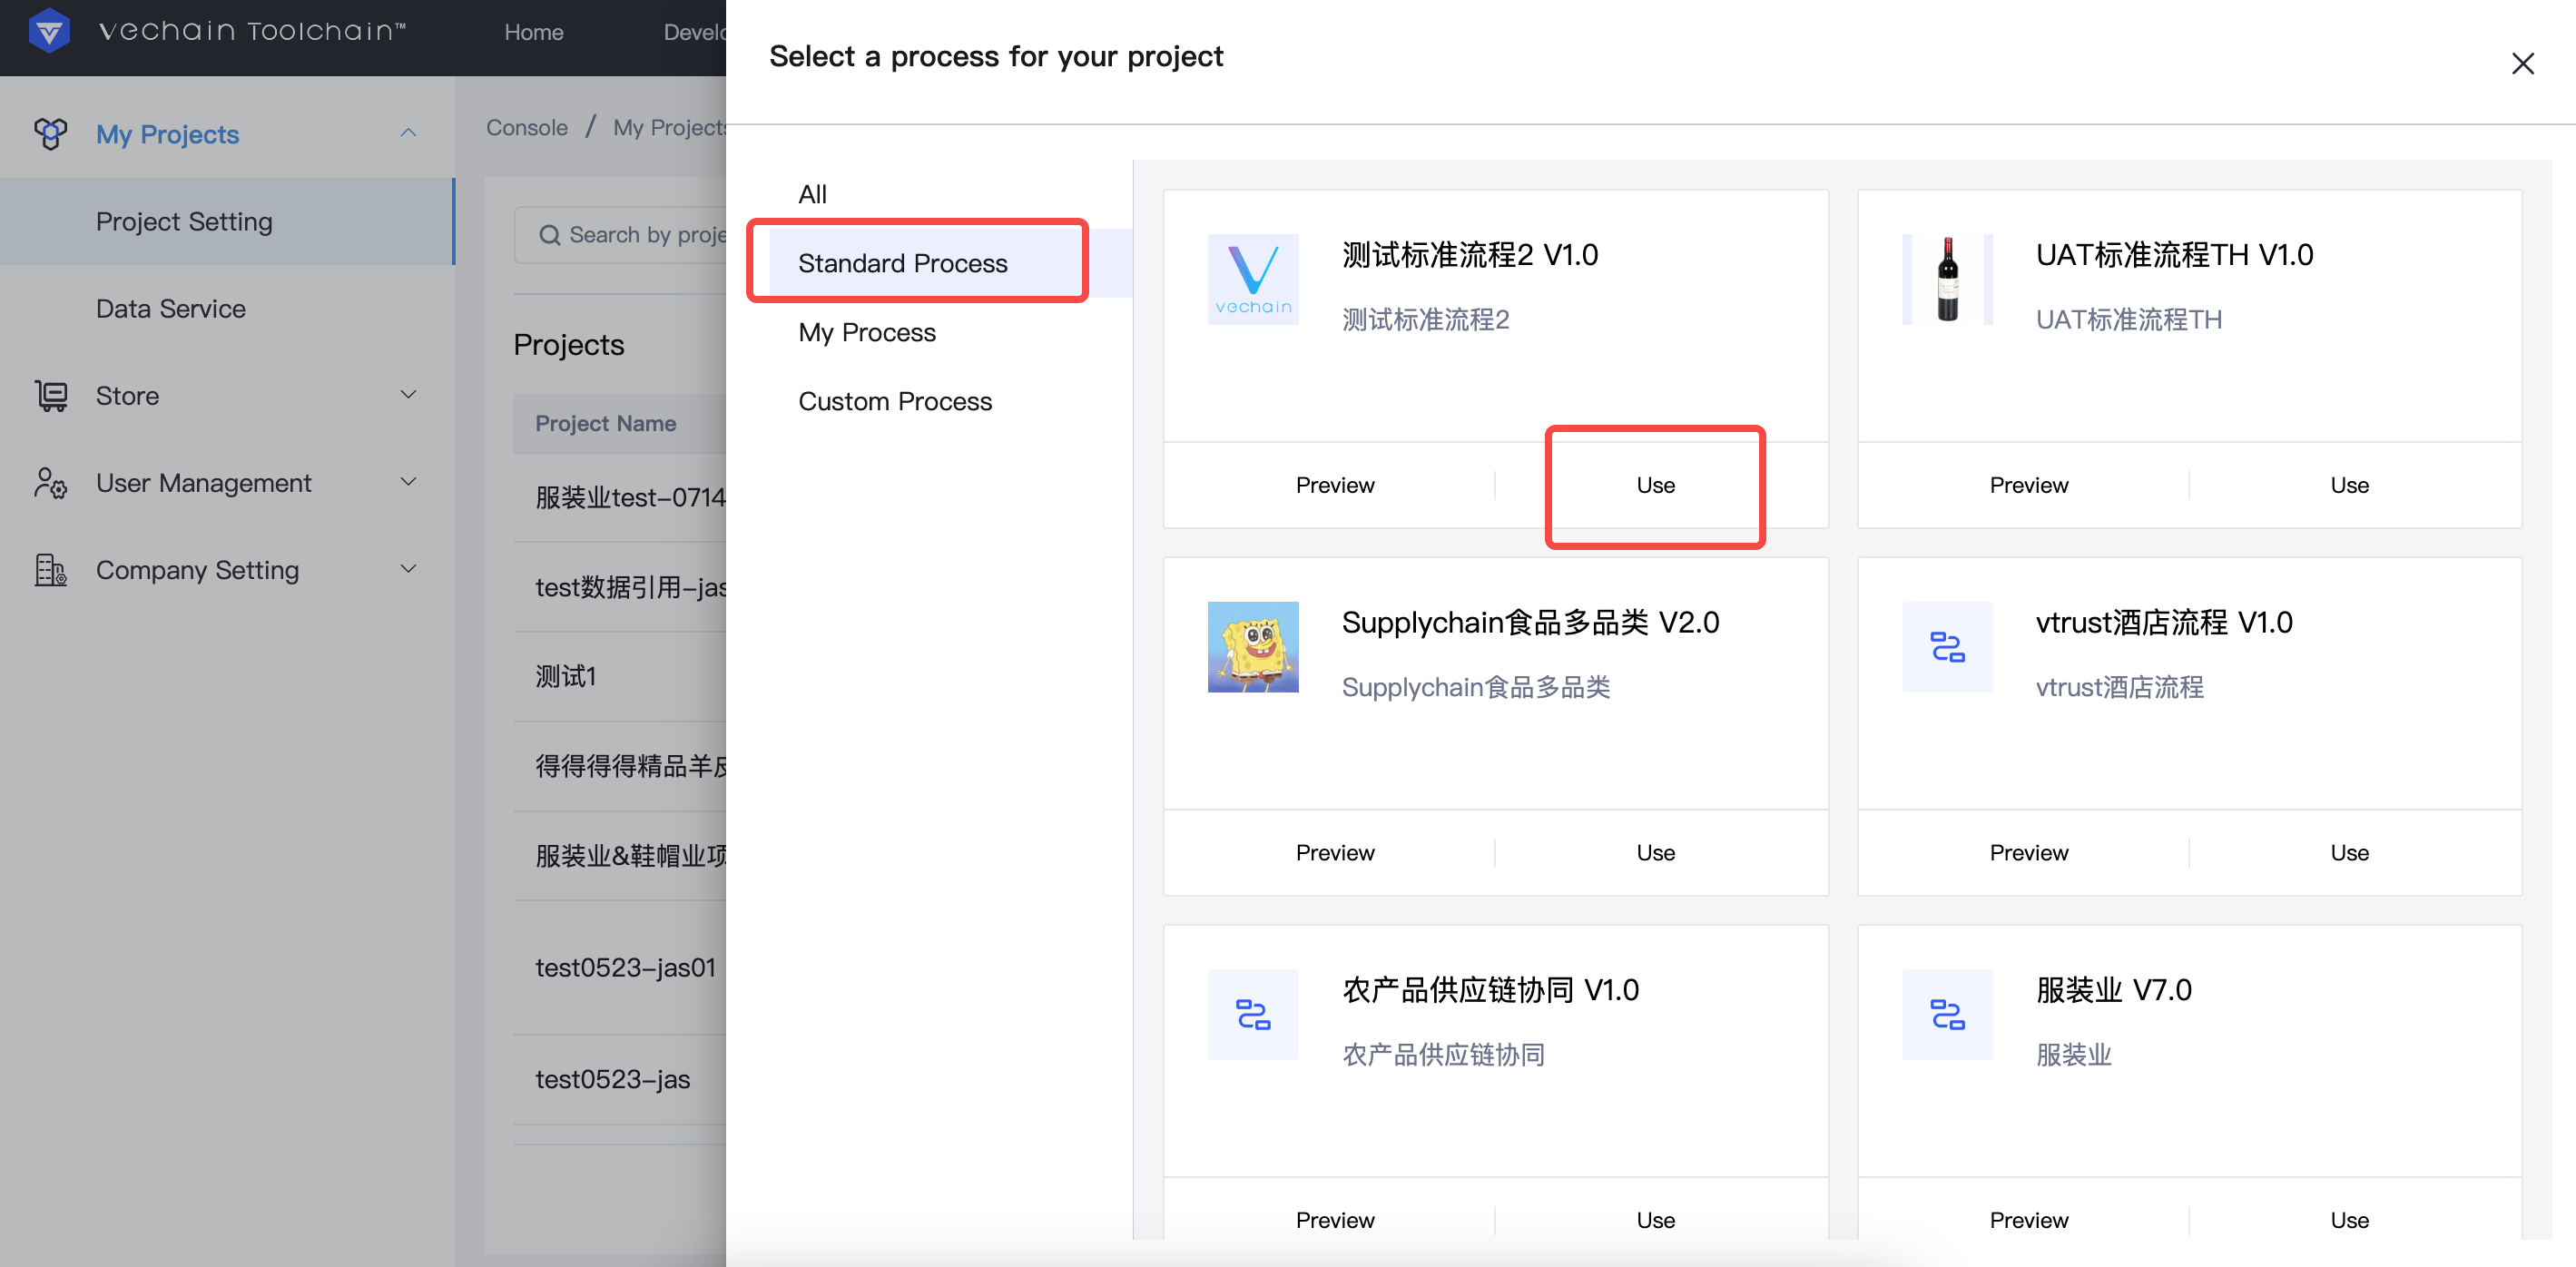
- When using <Standard Process>, such as <General Traceability Process>, please follow the steps below:
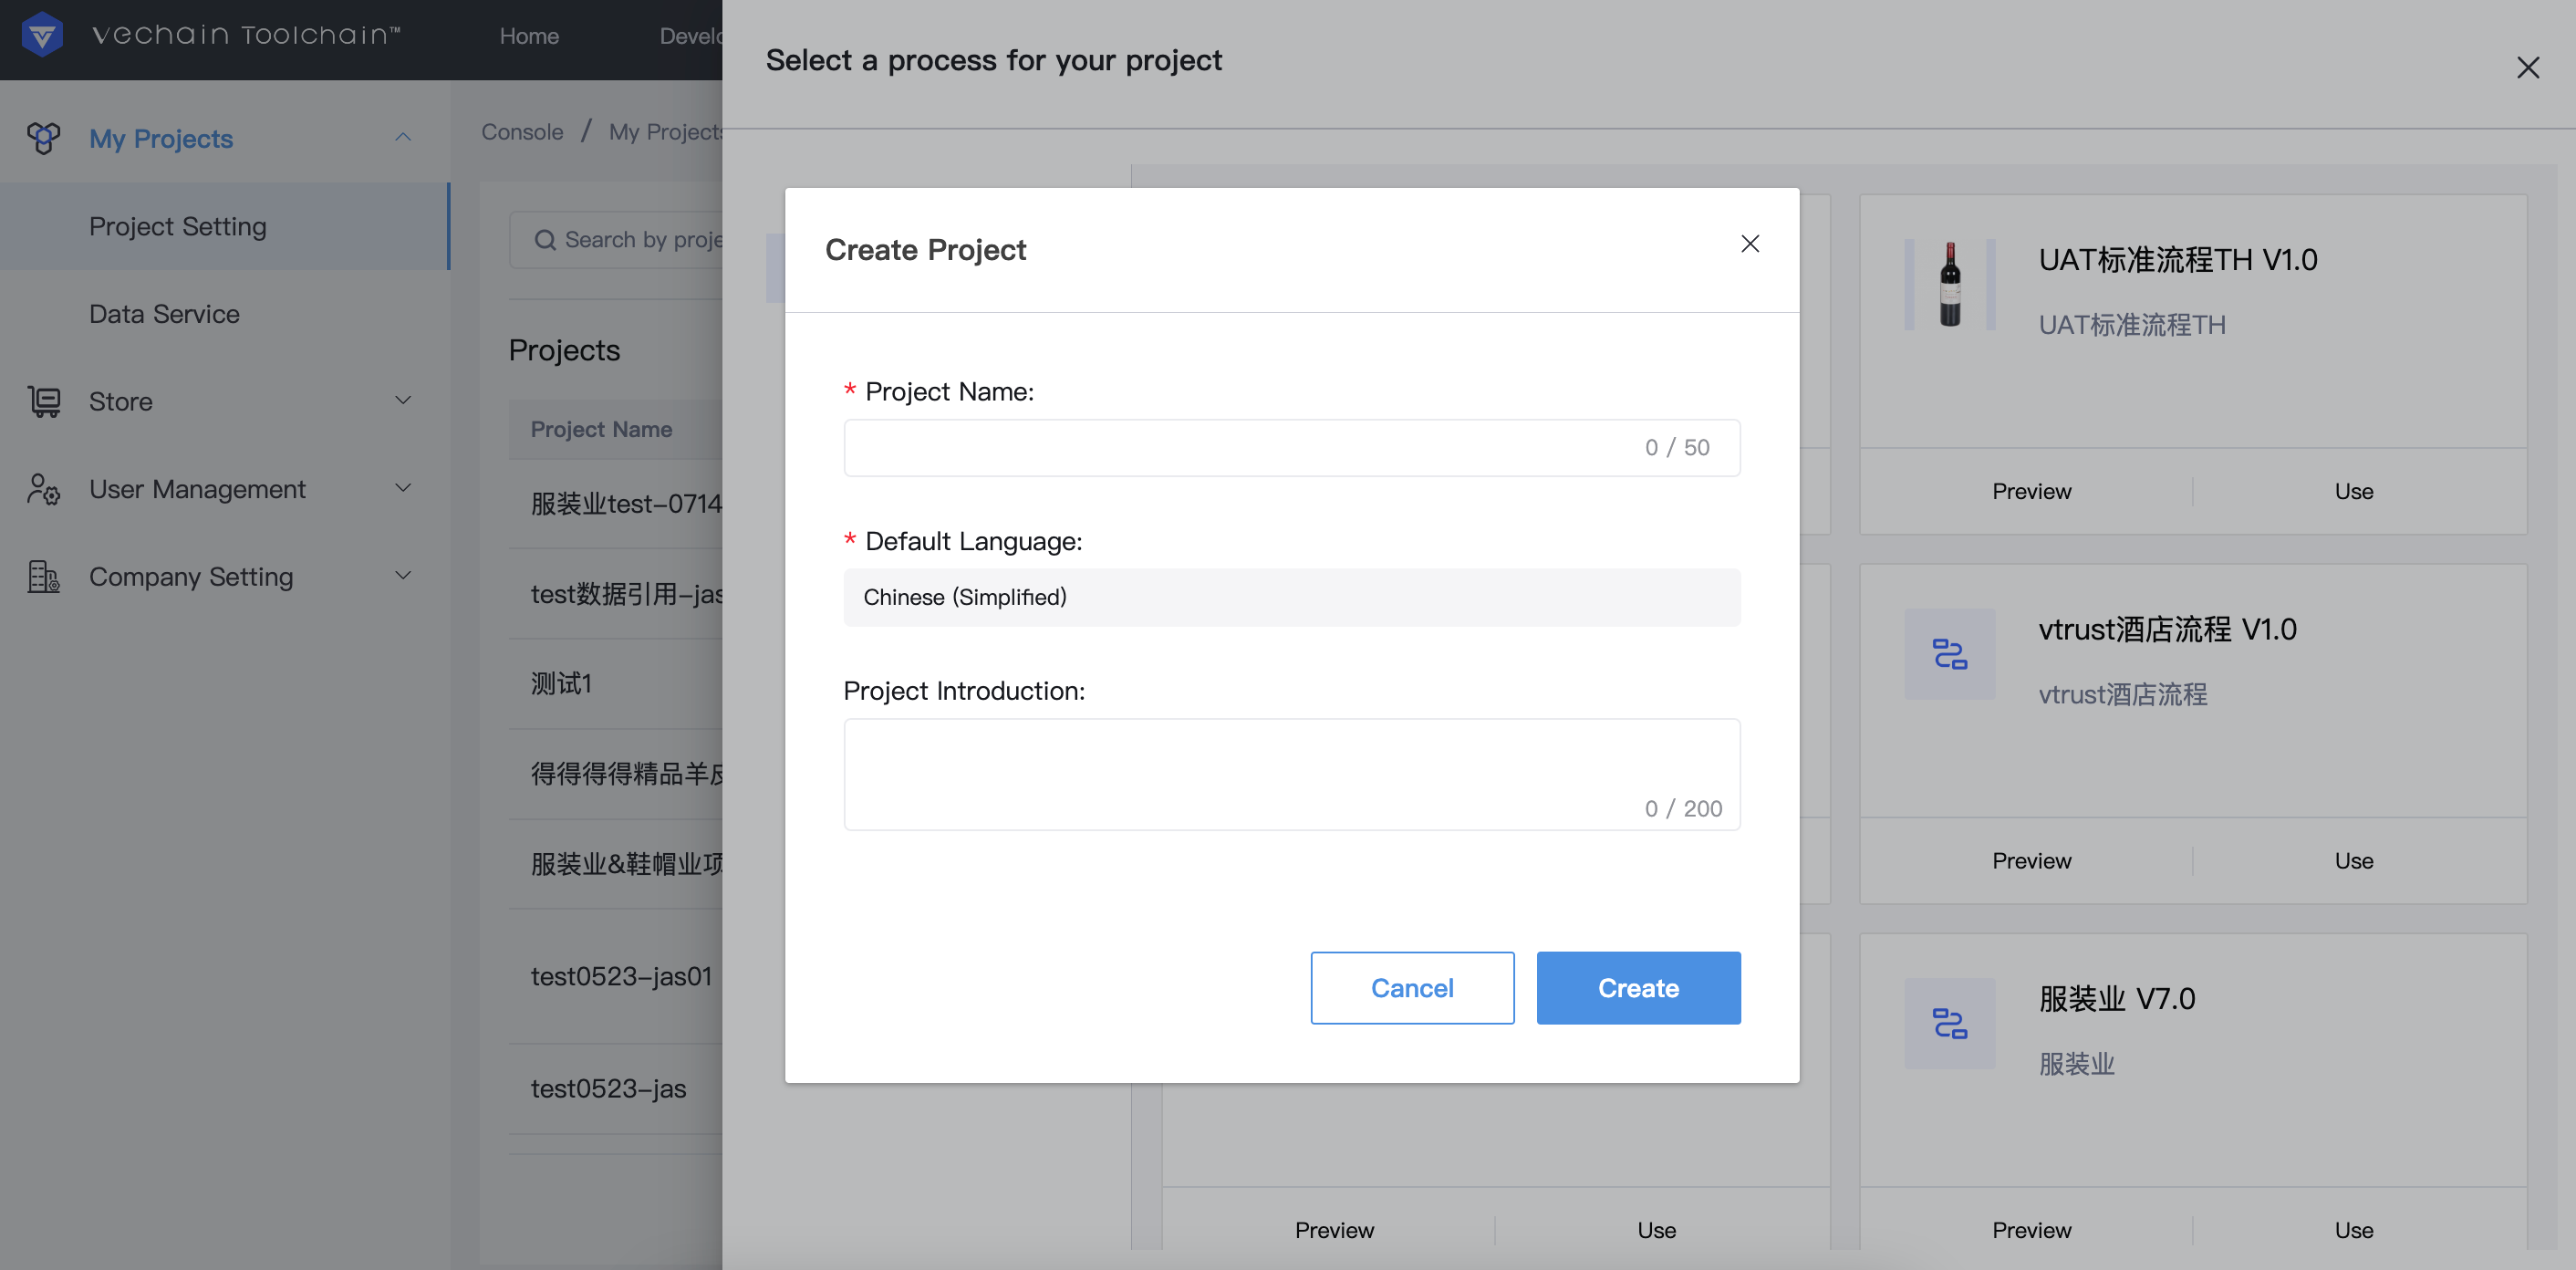
Select <General Traceability Process> - <Use> (Figure 1 below). Enter project name and project description (Figure 2 below).
- When using <My Process>, please create and submit the process in <Process Builder> first, and then follow the steps below:
Select an applicable process - click <Use> (Figure 1 below). Enter project name and project description.
- When using <Custom Process>, please follow the steps below:
Select an applicable process - click <Use> (Figure 1 below). Enter project name and project description.
Project Setting
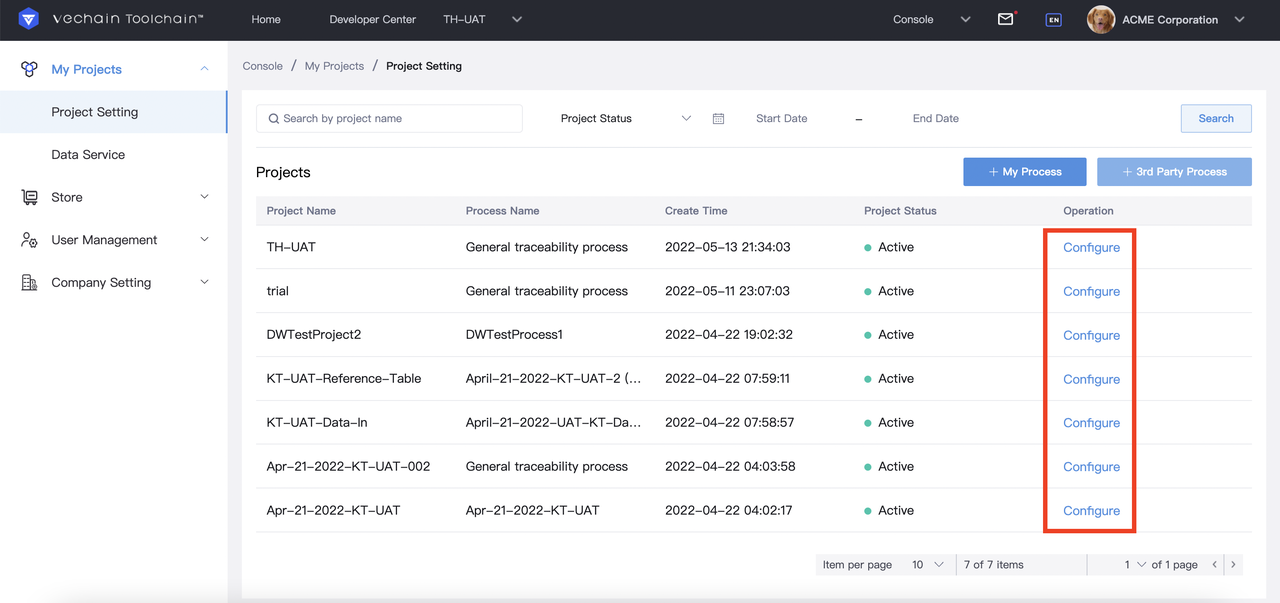
Once the project is successfully created, you can go back to project list and click <Configure> to adjust project-related settings, which includes Profile Information, Access Permission, Professional Service, Data Service, and Operation Log.
<Professional Service> and <Data Service> are value-added services, please refer to <Value-added Services> for more information.
- Profile Information
Profile information includes project ID, project name, project process, project status, etc.
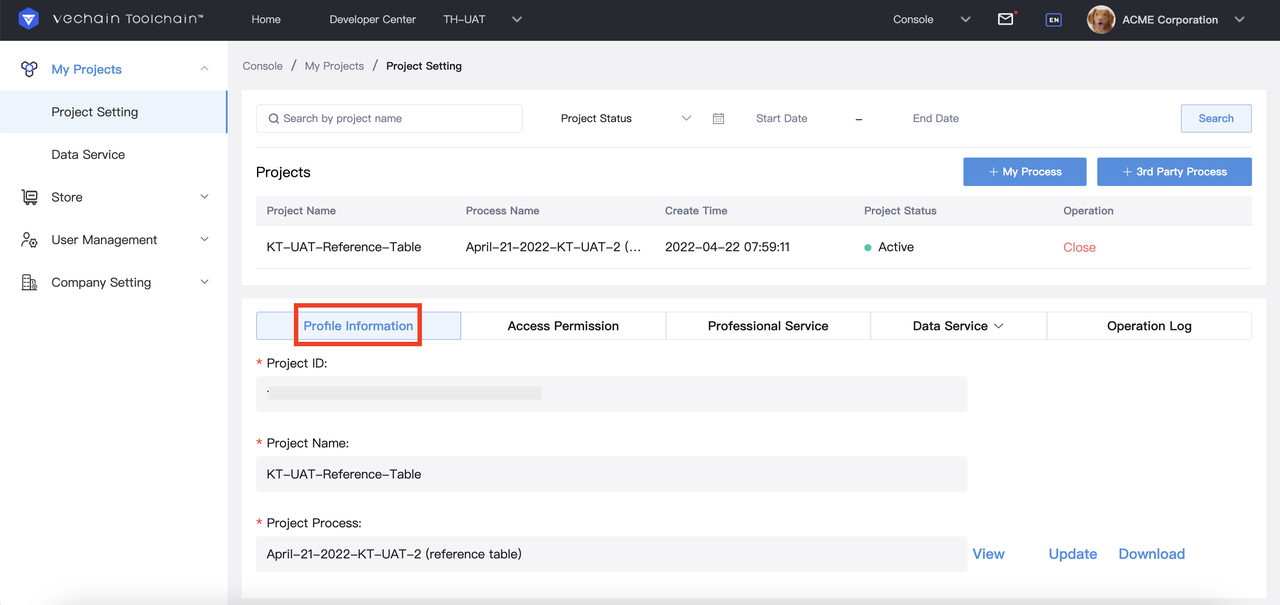
Update: After submitting a new version of the process in <Process Builder>, you need to update the process to apply the latest version to this project.
To avoid disrupting the production data during user updates, you must edit and switch the project status to "Deactive" under Profile Information before you click <Update>. Then, select the new version to update. Wait for the "Upgrade successful" notice, or click <View> to check the current version of the process. Once the update is complete, switch the project status back to "Active".
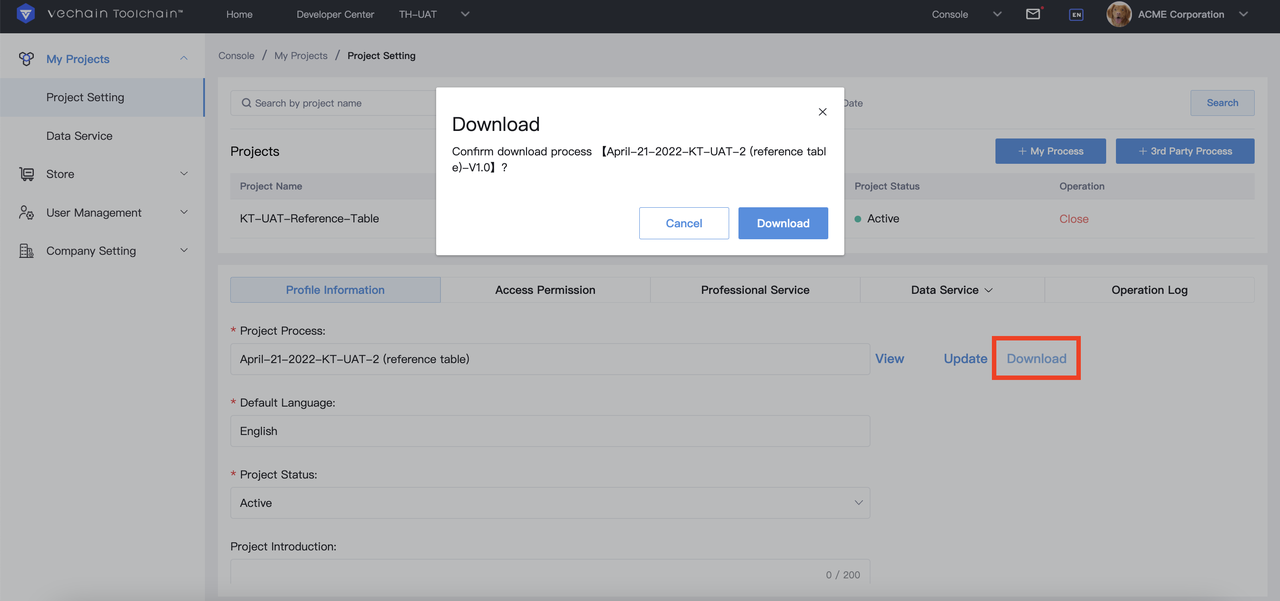
Download process: If you import data through API, this file will be used as a template for you to enter data. See <Developer Center> for more details on API import.
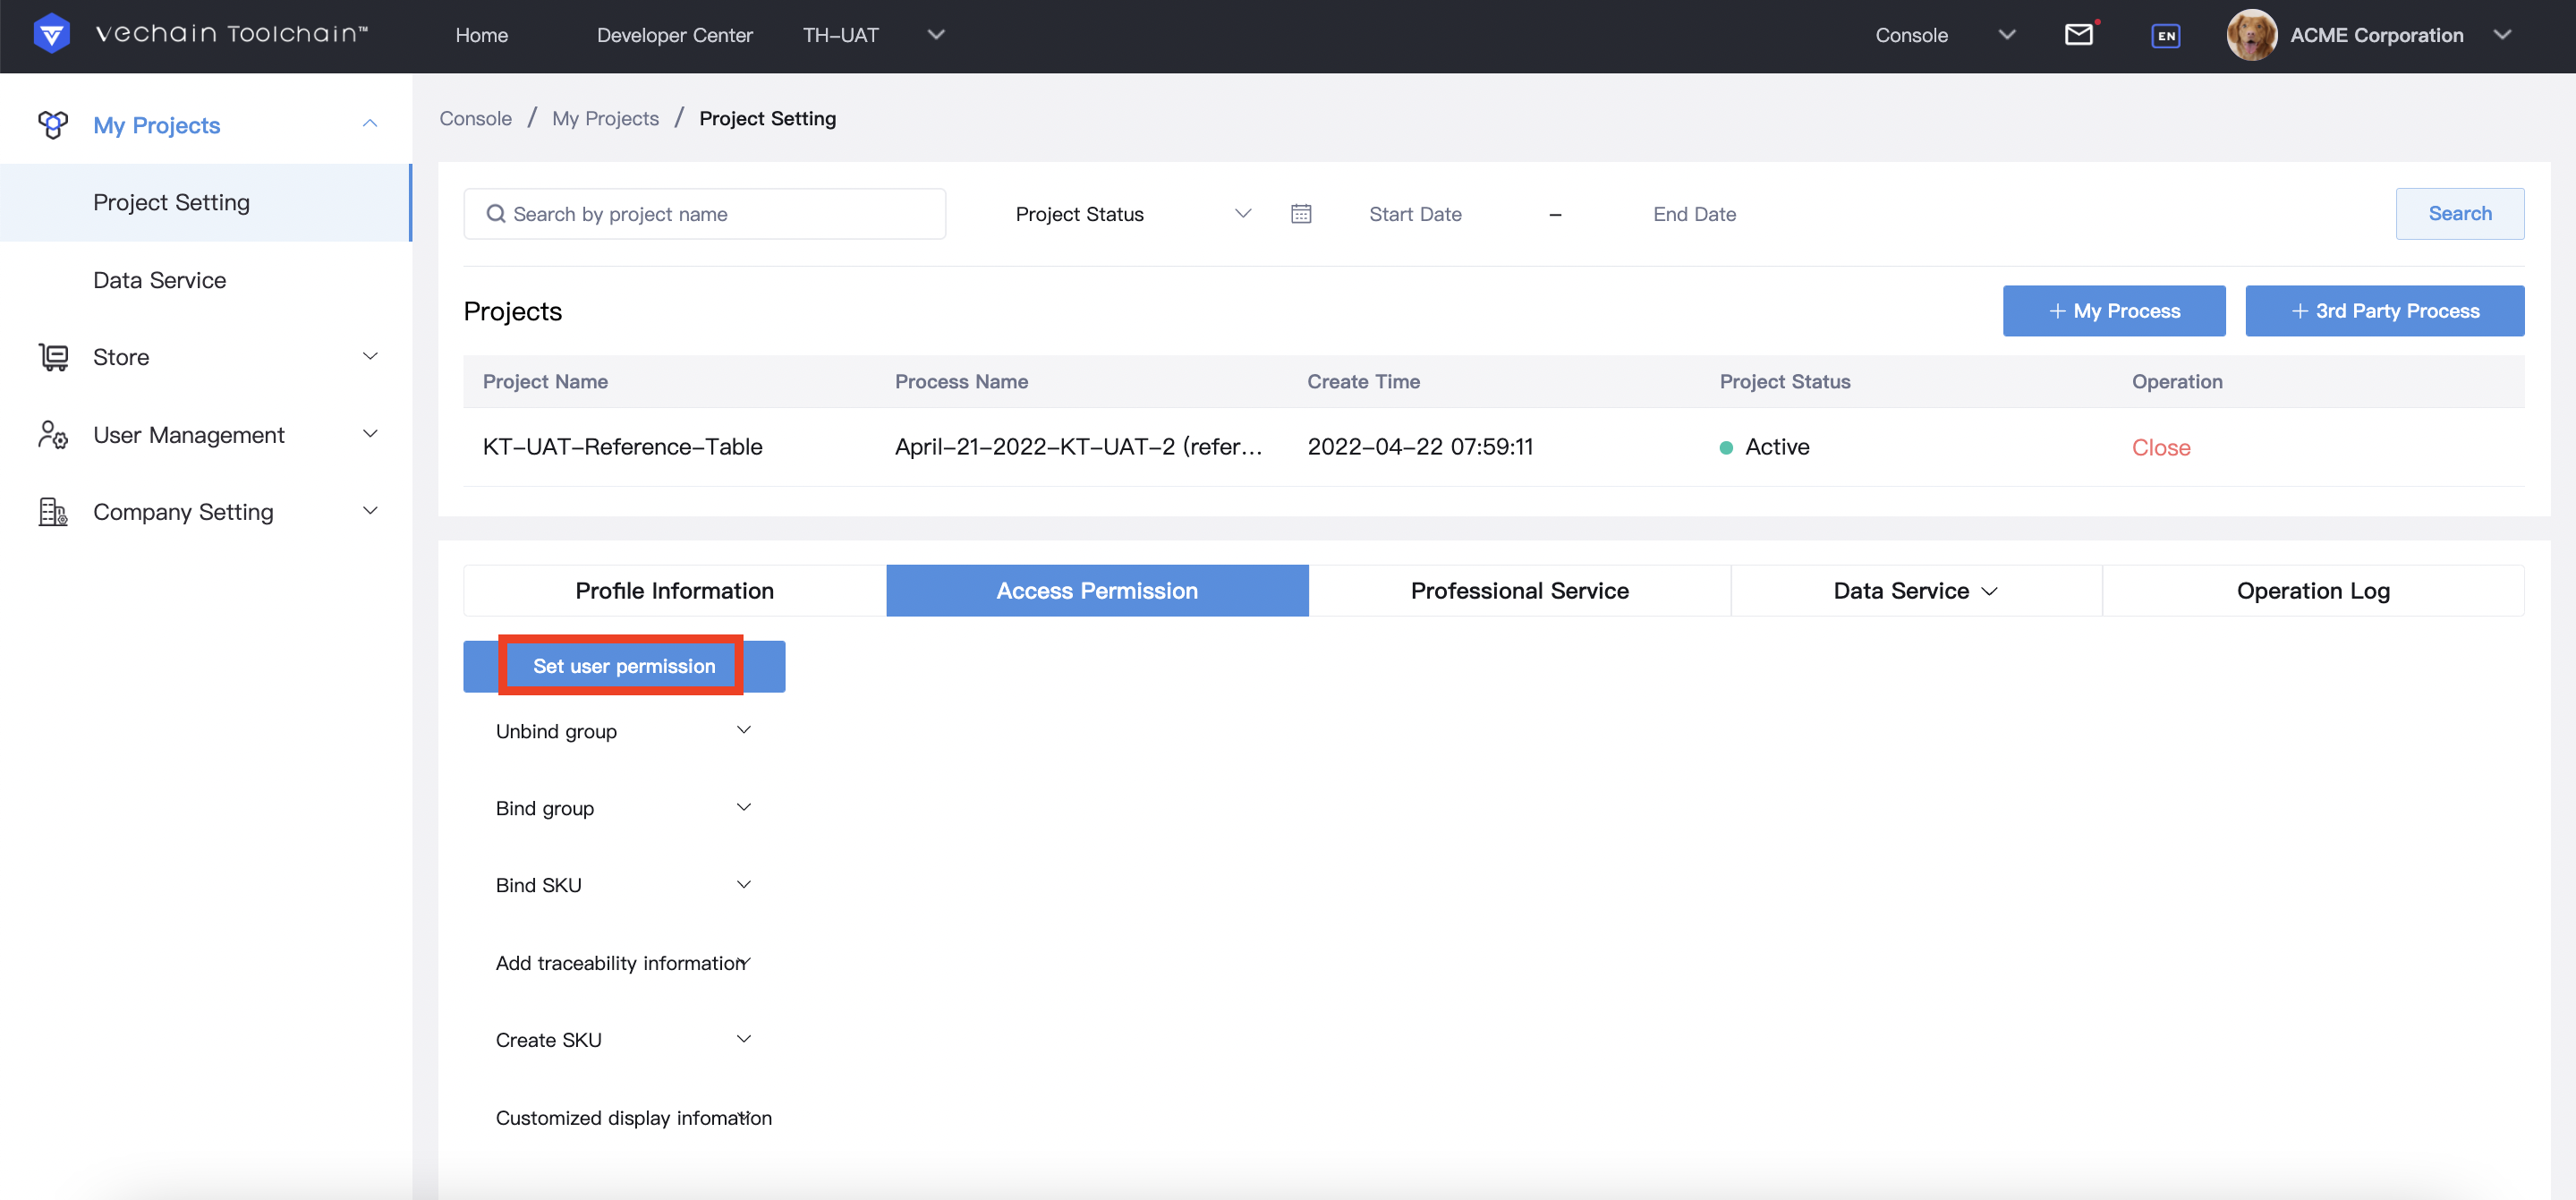
- Access Permission
Access Permission is used to grant employees permission for each step in the process. You can manage access permission for multiple steps, or manage each step at a time. Simply follow the instructions below:
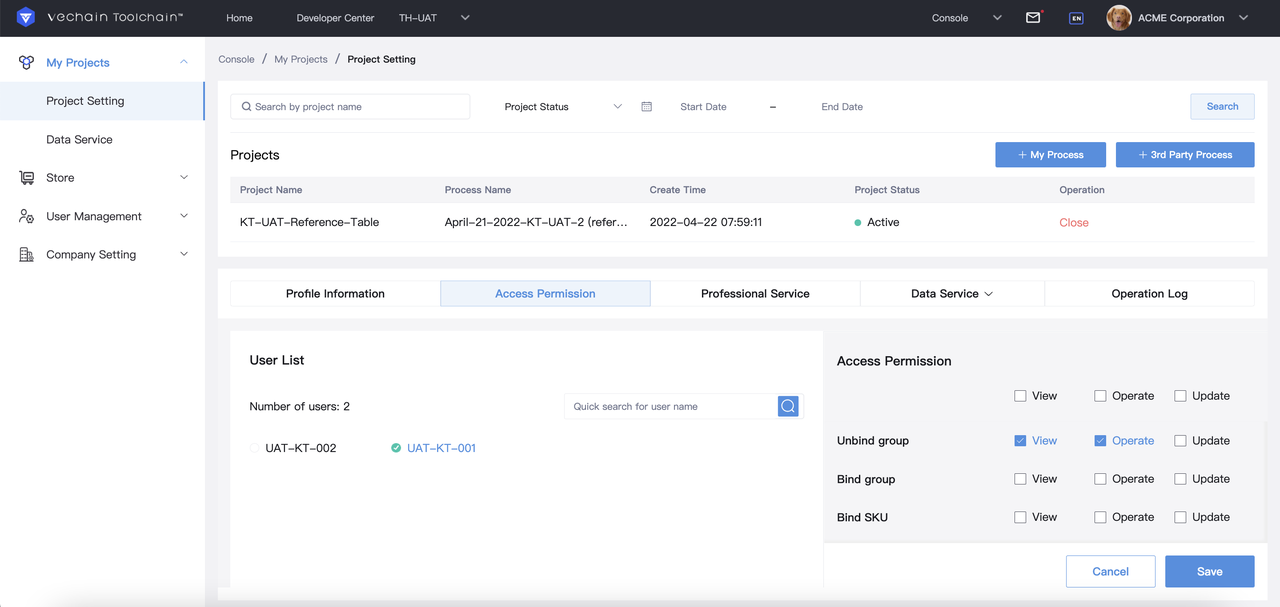
Change access permissions in bulk:
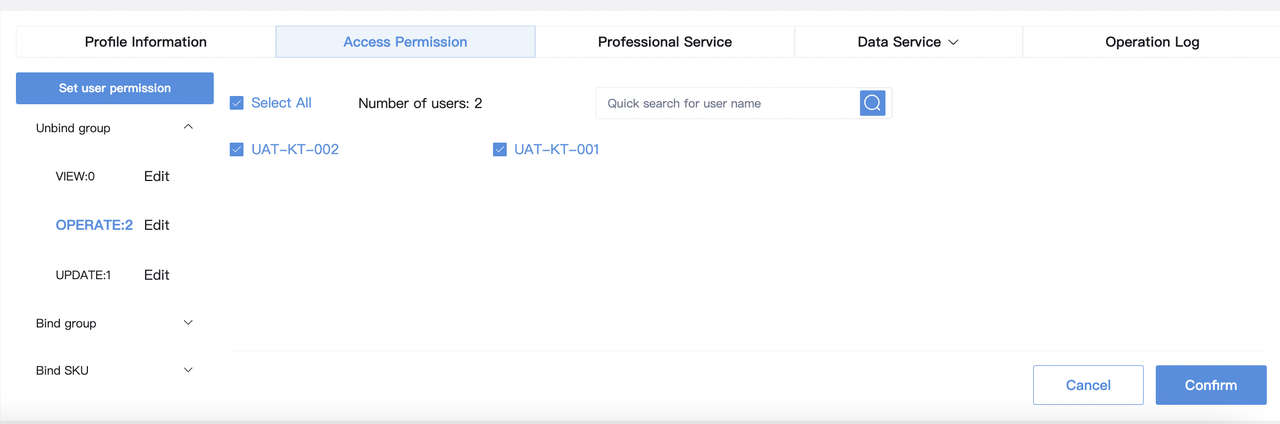
Once the project is successfully created, go to the project list under Project Setting. Go to <Configure> - <Permission Setting> - <Set User Permissions>. Select an employee and check the permissions to grant this employee permission(as shown below).
Change access permission for single DCP&permission :
Under Access Permission, choose a step of the process, and select a permission type you would like to change. Click <Edit> to grant employees permission to view, operate or update data.
- Operation Log
The administrator can view the operation logs on all DCPs of the project here.
You can filter the log by time, or enter keywords to fuzzy search.
Project Operation
- Enter Project
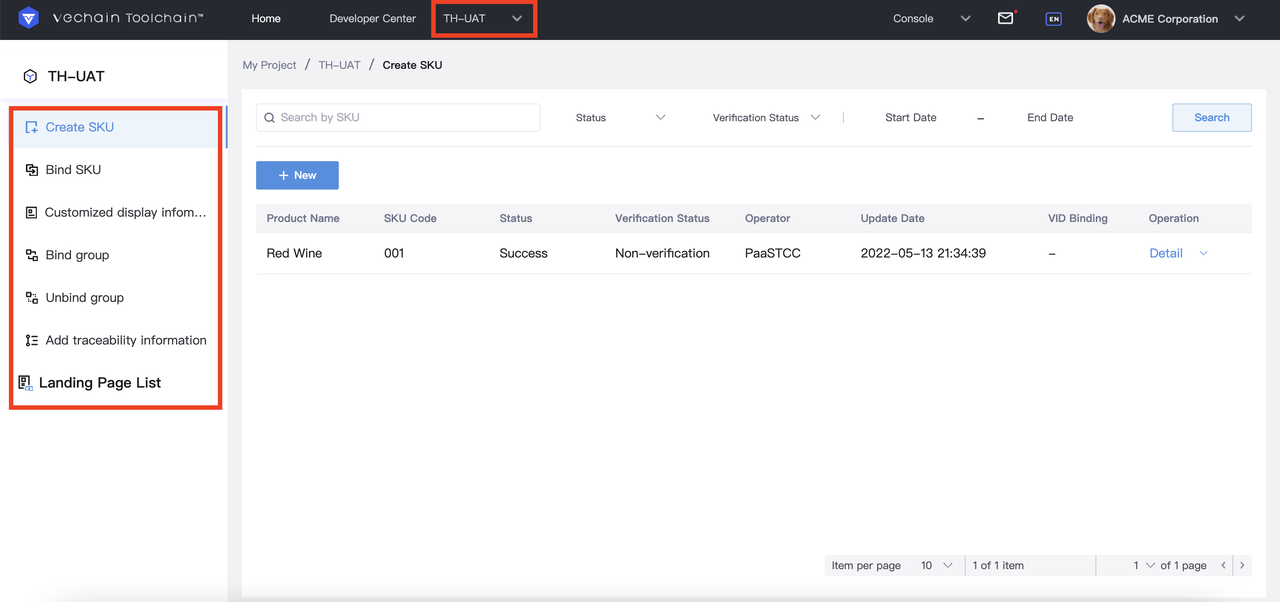
To enter a project, select it from the drop-down menu on the top navigation bar. You can operate the DCPs of this project.
Take <General Traceability Process> for example, there are 6 DCPs under this process: Create SKU, Bind SKU, Custom Display Information, Bind Group, Unbind Group, Traceability Information (as shown in the figure below).

- Create SKU
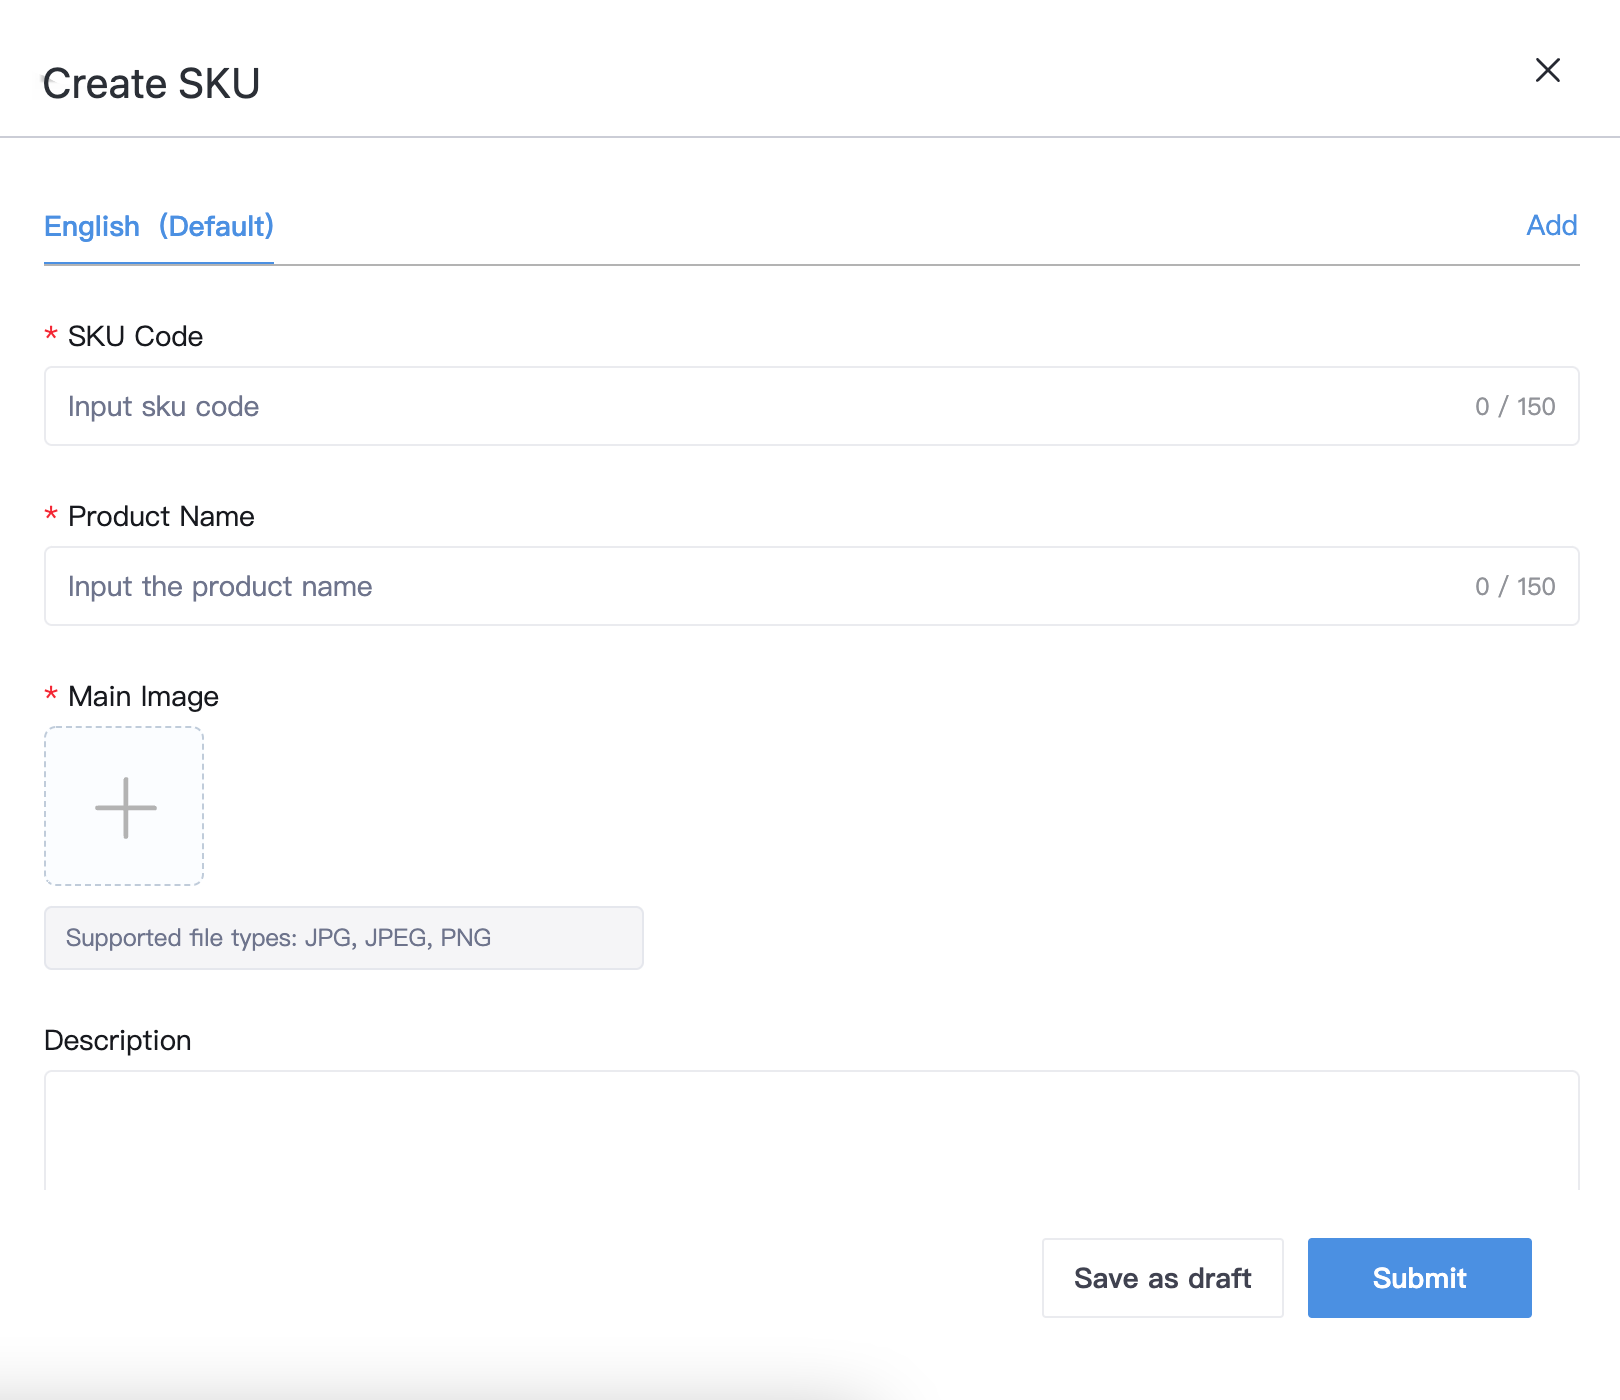
Click <Create SKU> - <New>. Fill in the form by entering SKU code, product name, description, parameters, and upload a main image and relevant files. Make sure you fill in all required fields marked with "*".
In the process of creating an SKU, please note that:
- You cannot create a new SKU using an existing SKU code.
- The main image must not exceed 10MB in file size.
You can use <Save as draft> to save an SKU, and go back to edit it by clicking <View> - <Edit>.
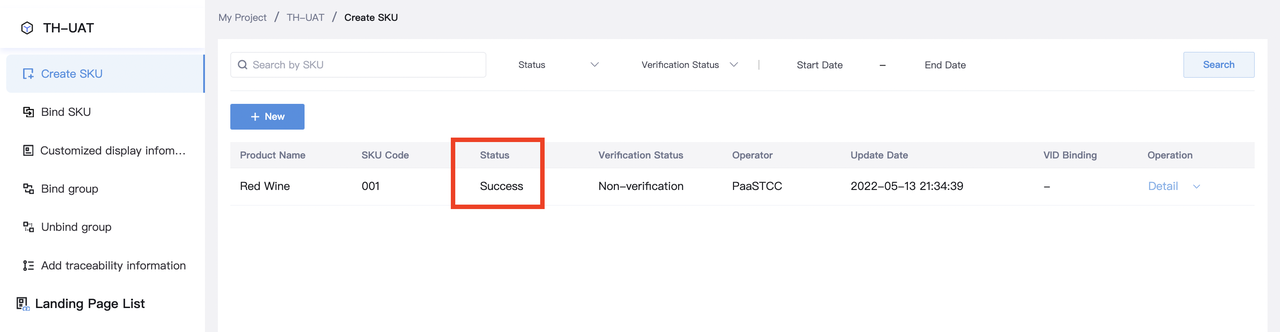
Click <Submit> to upload the SKU to VeChain Blockchain. When the status turns to Success, your SKU has been successfully uploaded.
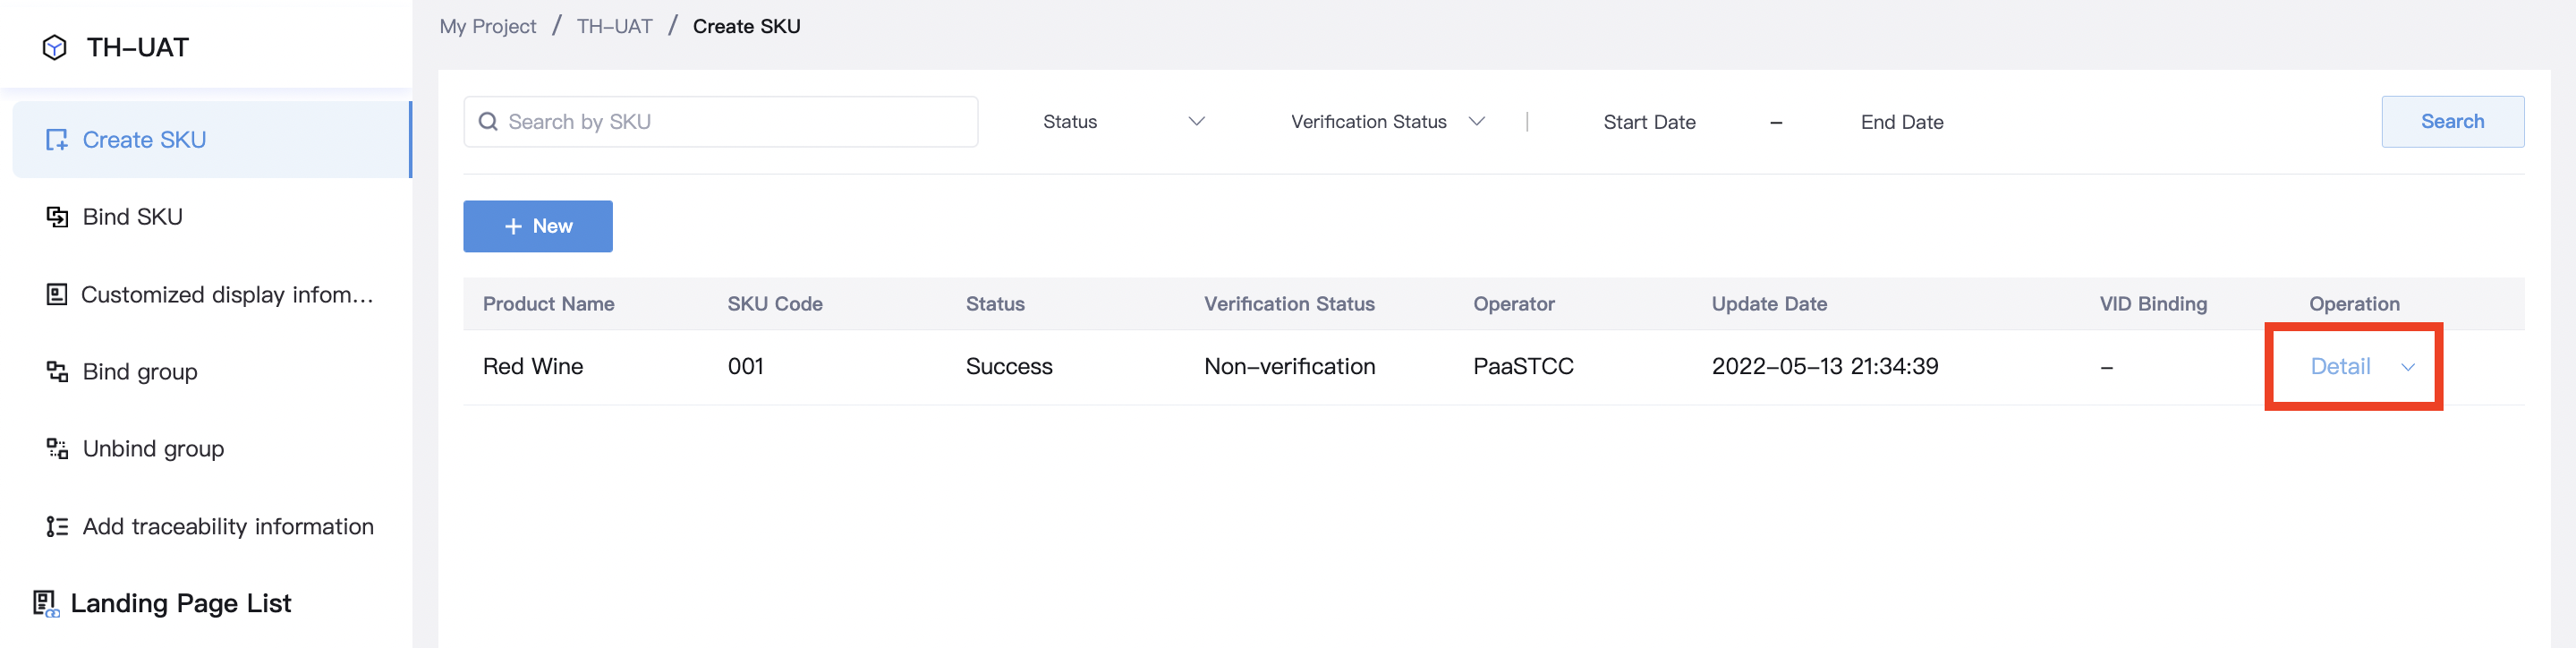
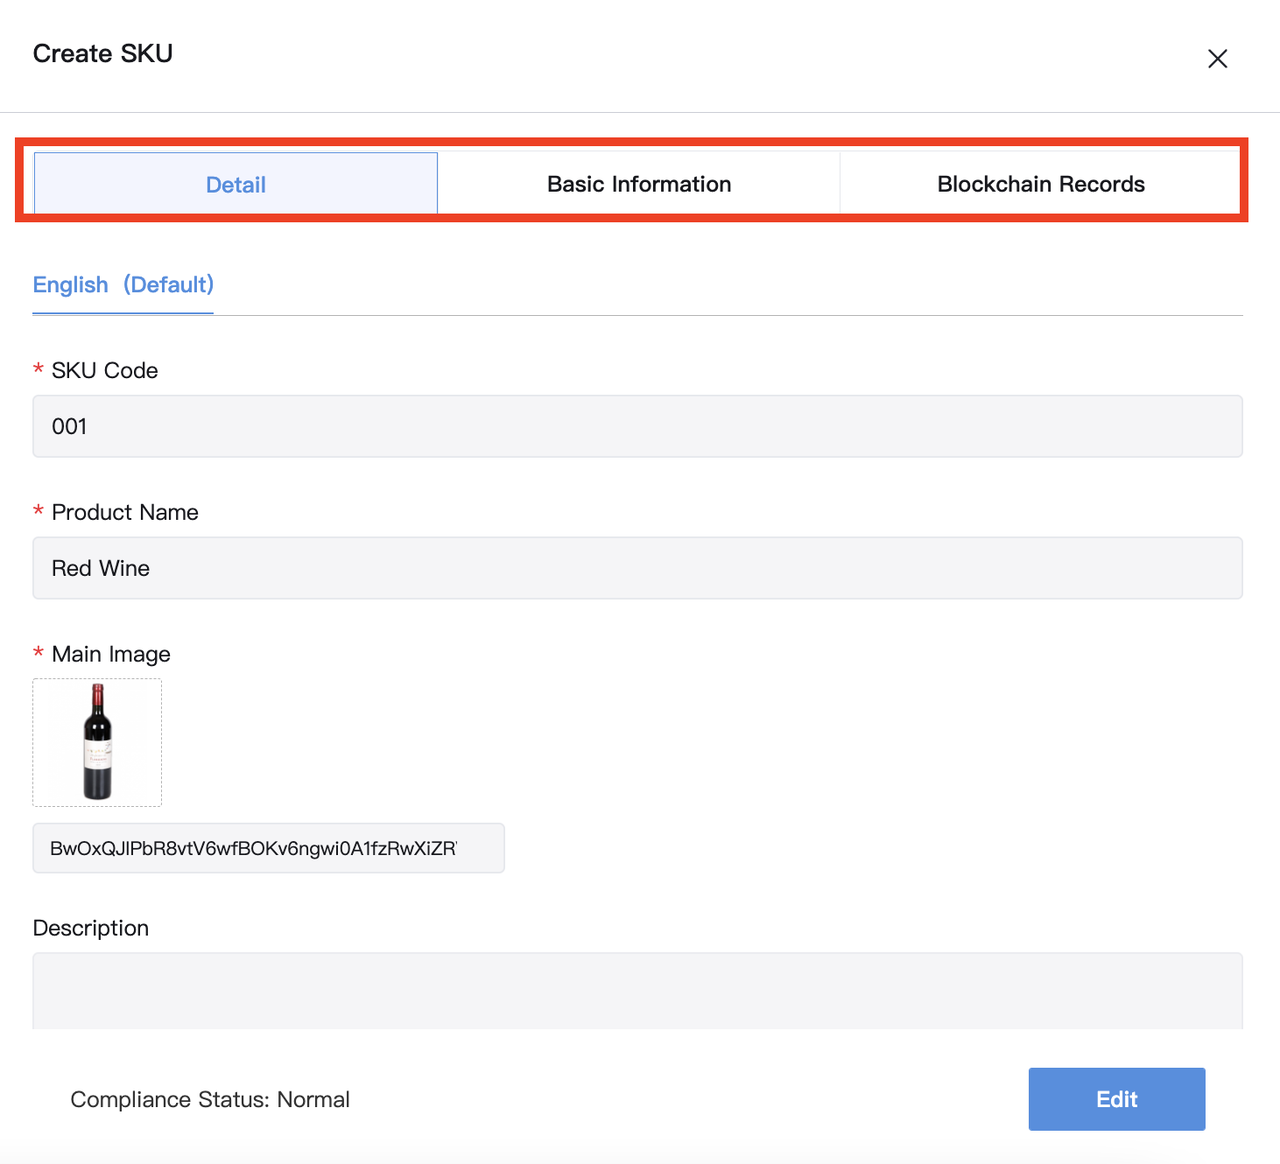
- SKU Details
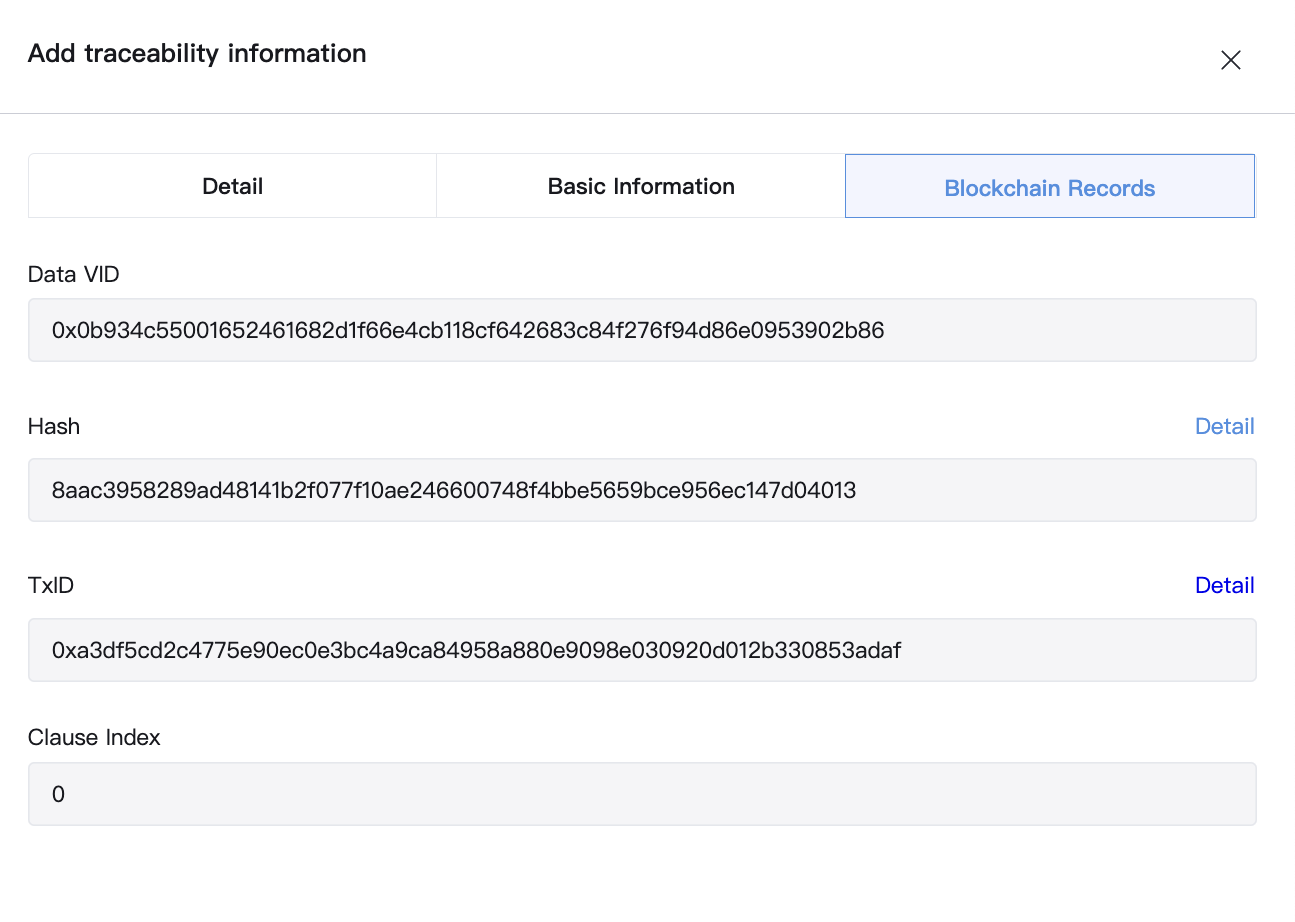
Once the SKU information is uploaded successfully, you can click <Details> - <Blockchain Records> to view the blockchain records.
If you wish to update the SKU that has been created, click <Edit> at the bottom of the Details page. All update records will be stored on the blockchain.
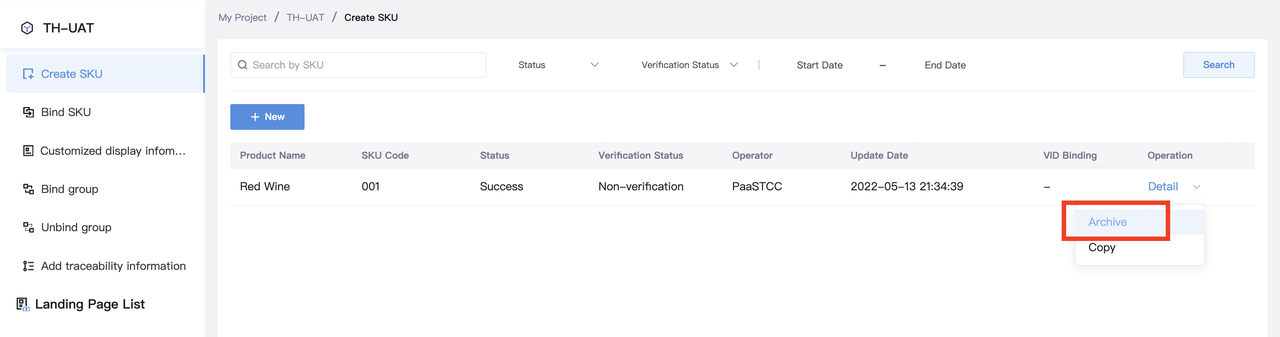
- Archive SKU
If a product is no longer produced or for sale (End-of-life), the administrator can <Archive> the SKU as shown below. Once archived, operators will no longer be able to operate the SKU. Please note that only the administrator has the permission to archive SKUs.
- Unarchive SKU
If an archived product is back in production, you can <Unarchive> to resume the management of this SKU.

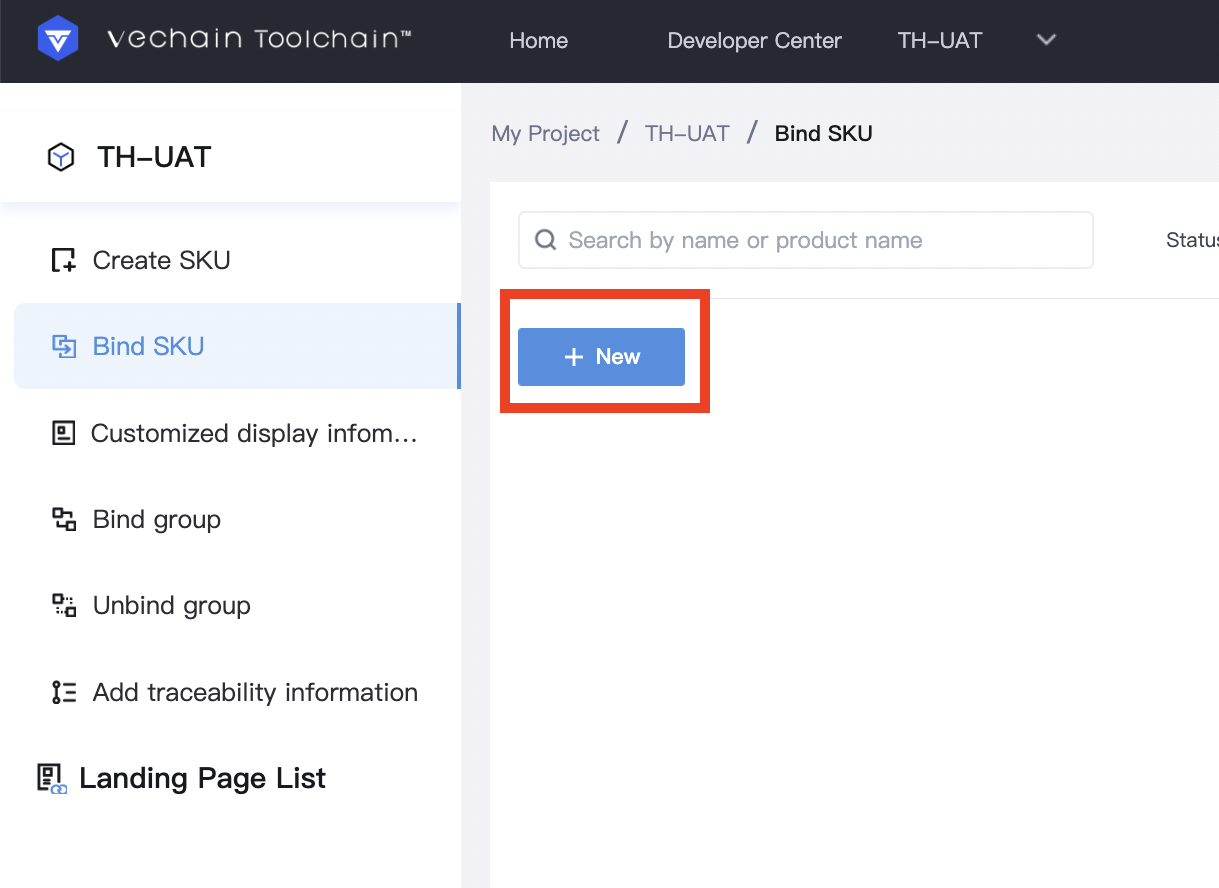
- Bind SKU
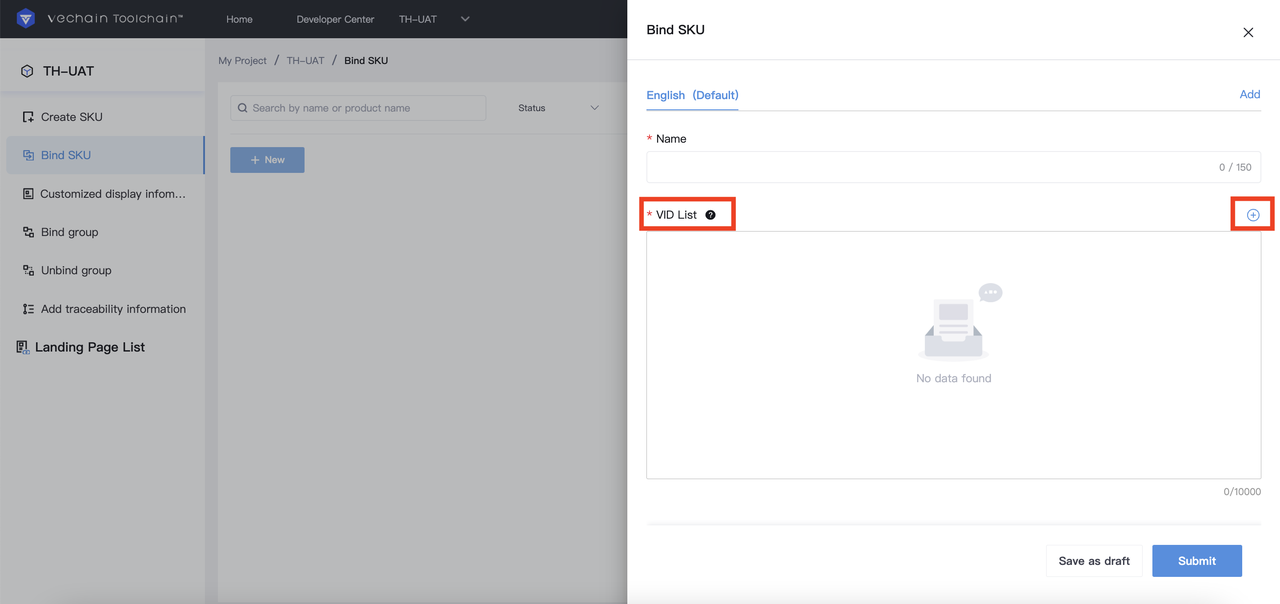
If you wish to bind products with tags (QR codes or chips), you can do so in <Bind SKU>, as shown in the figure below. There are two ways to bind SKUs: 1. bind through Web Portal; 2. bind through ToolChain Work App. The following instructions show how to bind SKUs through the web portal.
Under <Bind SKU>, click <New> to enter the data record page.
Click <+> next to VID (tag) list. You can select the VID order you want to use, and input the number of VIDs to bind with this SKU.
Select an order and use a number of VIDs from this order:
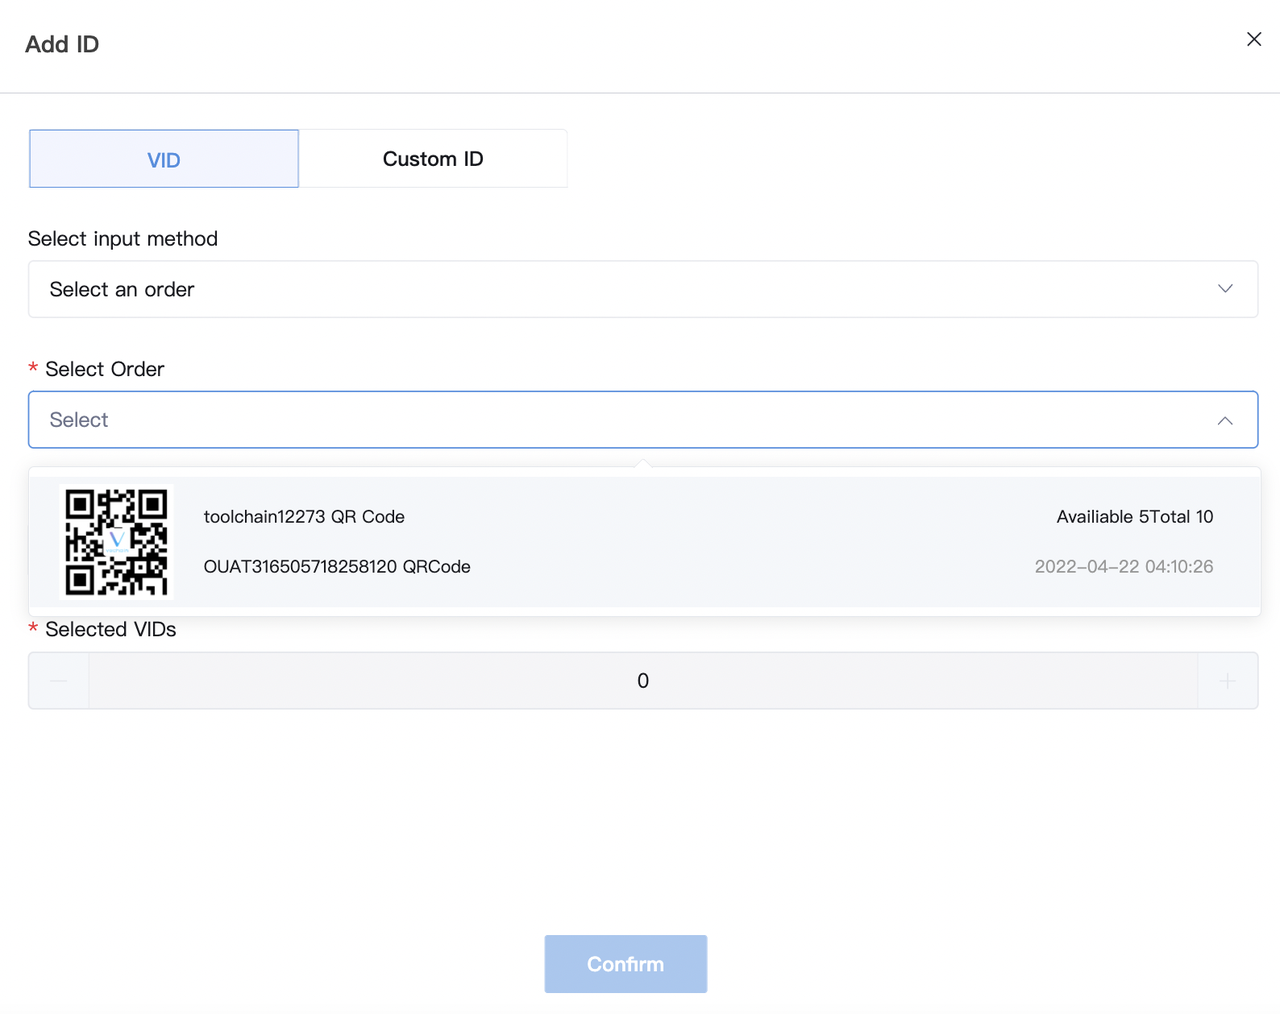
Click <Confirm> to select VIDs from this order.
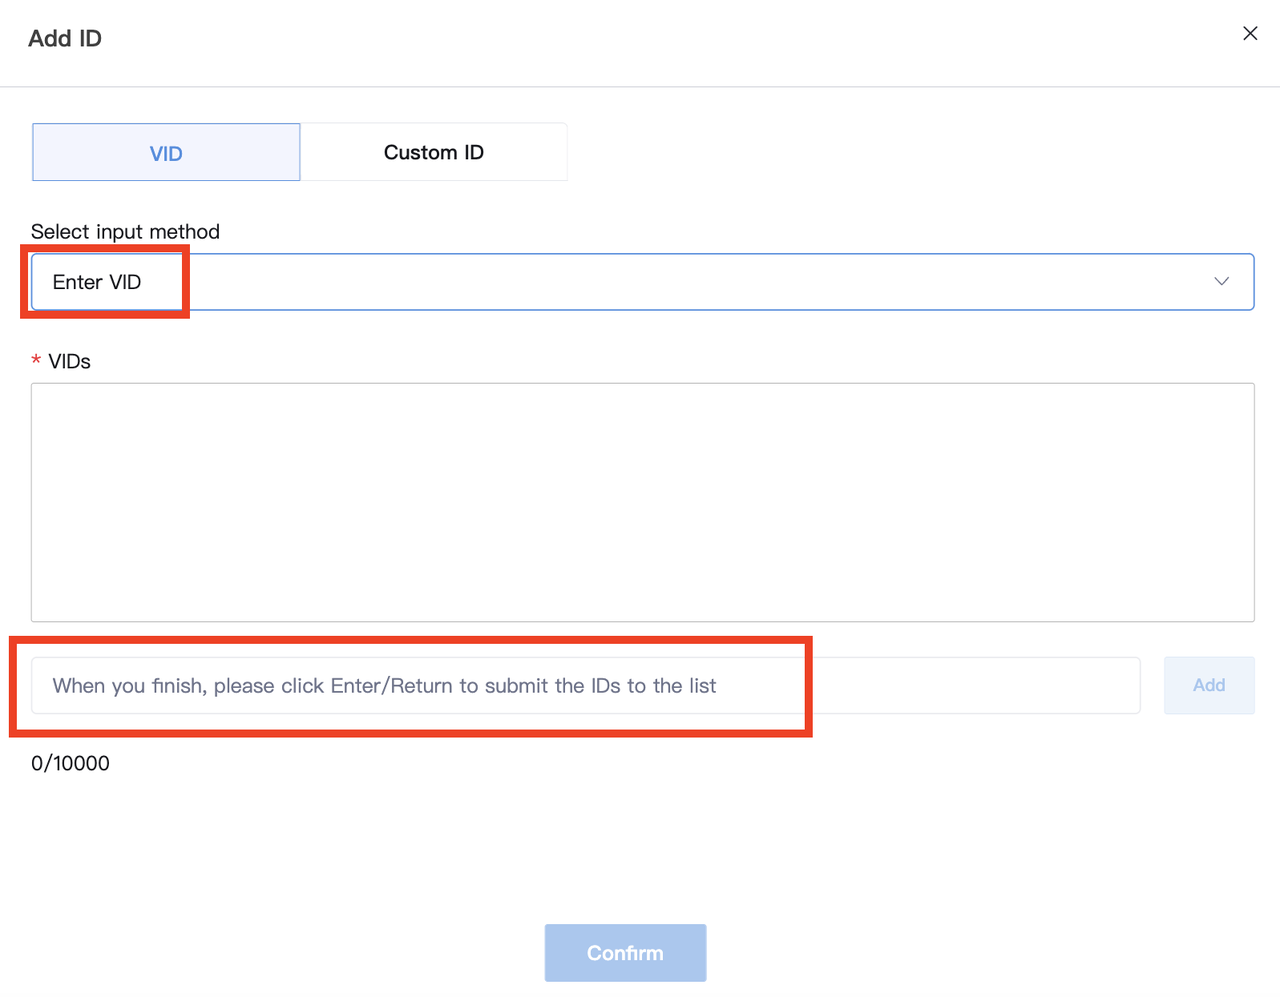
Input VID directly to bind specific VIDs:
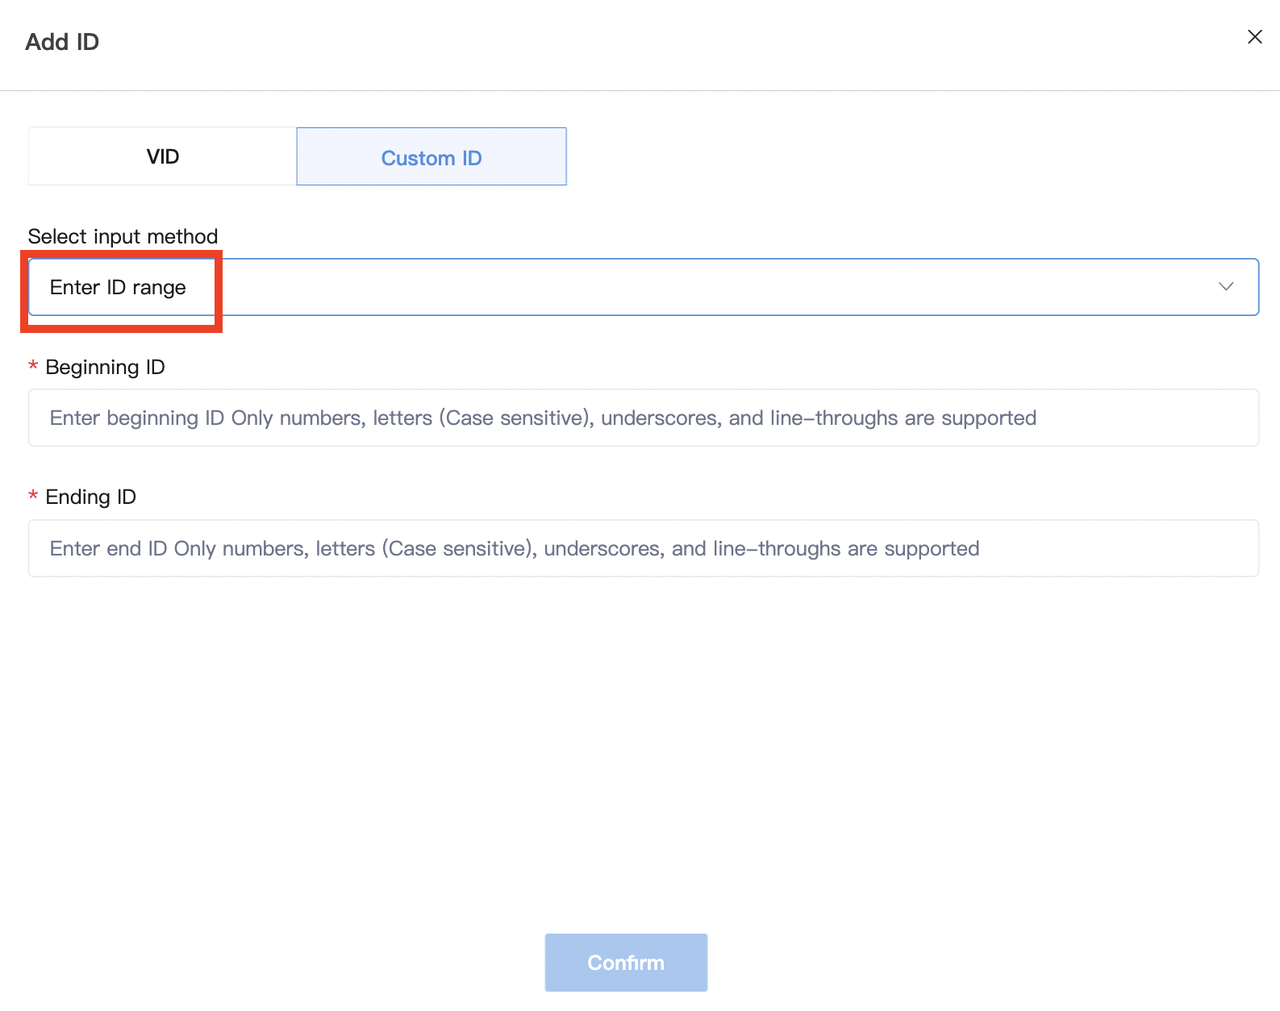
Under <Custom ID>, you can enter your custom ID by selecting <Enter Custom ID>, or <Enter ID range>.
<Enter Custom ID>
Enter the custom VID, click <Add> to select this custom VID for binding.
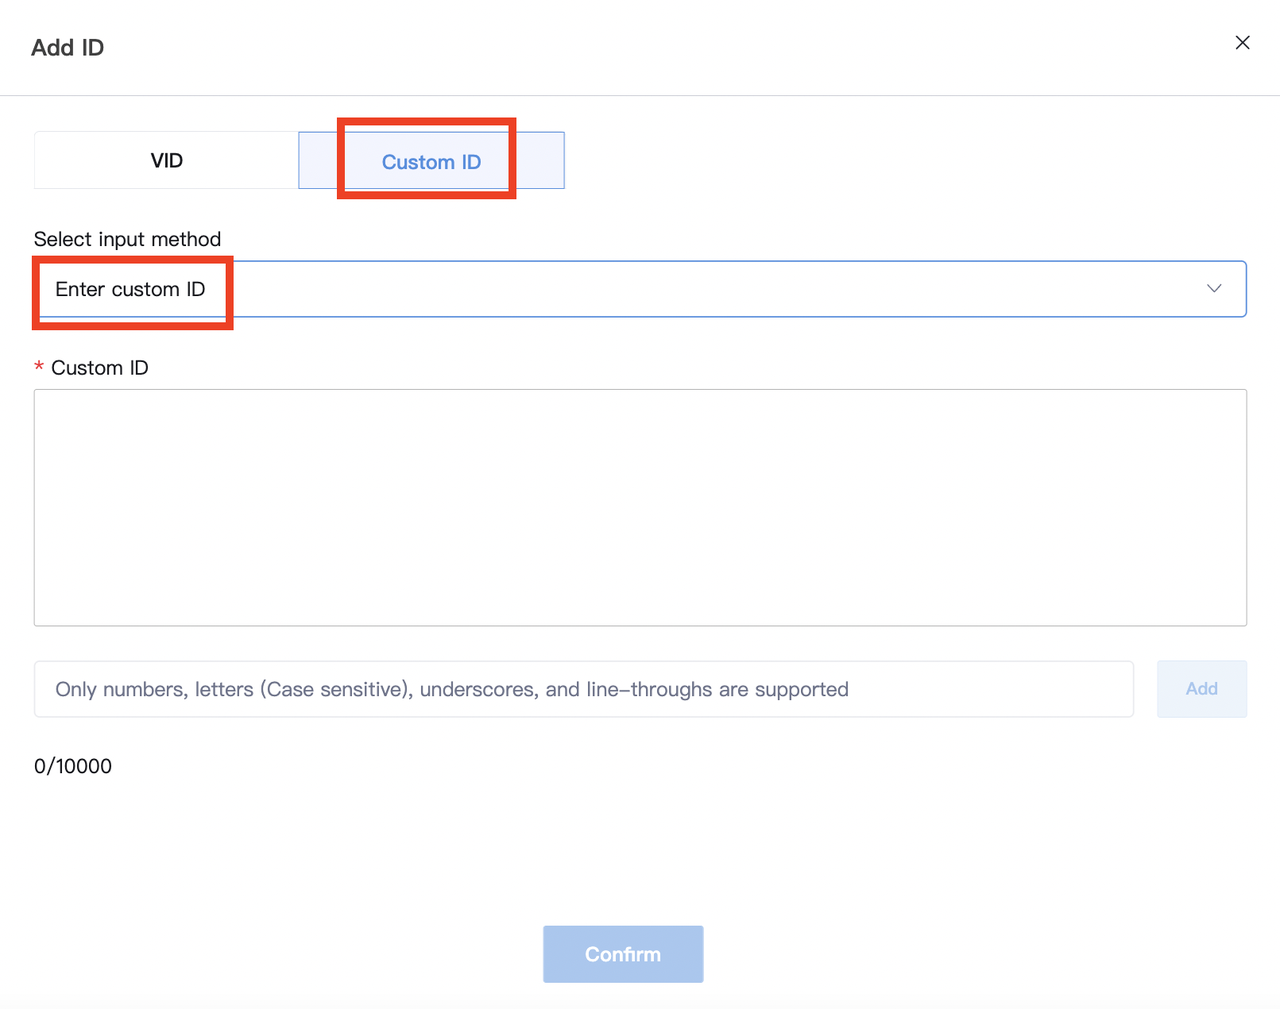
<Enter ID range>: Enter the starting and ending custom ID to bind a range of IDs, e.g. entering starting code DOCG000 and ending code DOCG999 will bind all 1000 VIDs in this range. Click <Confirm> to submit.
- IR Reader
Considering some logistics companies use infrared ("IR") readers to scan labels, VeChain ToolChain®️ also supports IR readers, please refer to the following instructions:
- Connect the IR reader with your computer. Select "Enter VID" as your input method.
- Scan the QR codes.
- Click <Confirm> when you have scanned all QR codes.
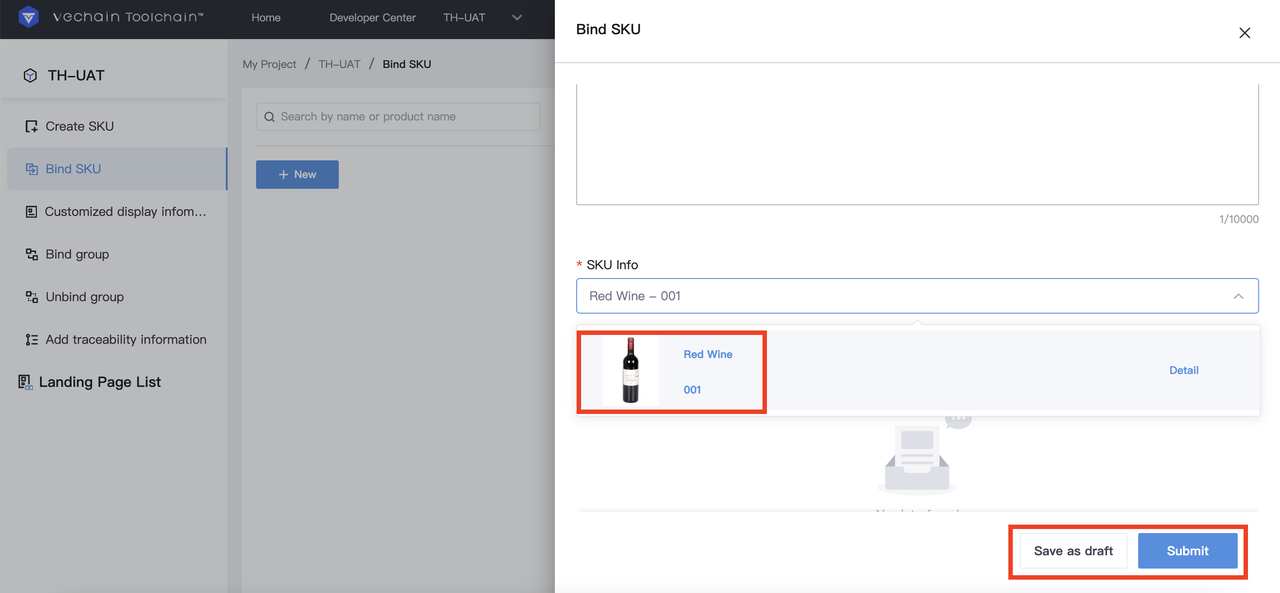
Click <SKU Information> to select an SKU from the drop-down menu and bind it to this VID. You can choose to save as draft or submit.
After you click <Save as draft>, you can return to the Bind SKU page (as shown below) to view saved drafts. After clicking <View> on this page, you can view the VID list again and click <Edit> if you want to update the data.
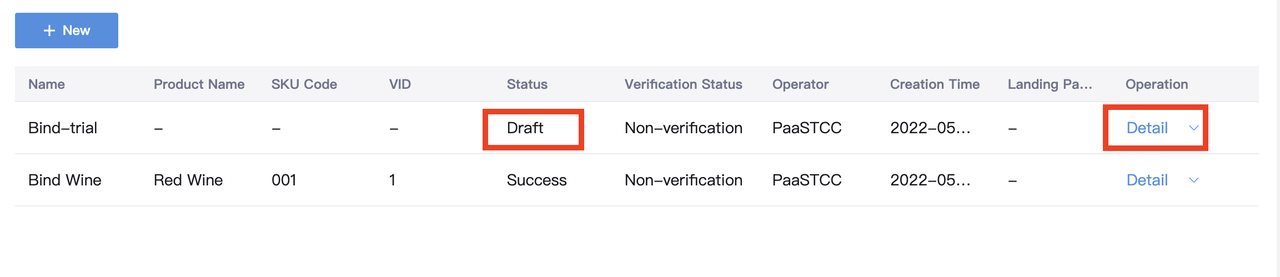
Click <Submit> to complete Bind SKU. Please make sure the VID matches the physical tags on products. Once you submit the data, please wait for a couple of minutes before its status turns to "Success". You can check its status under the Bind SKU page (as shown below).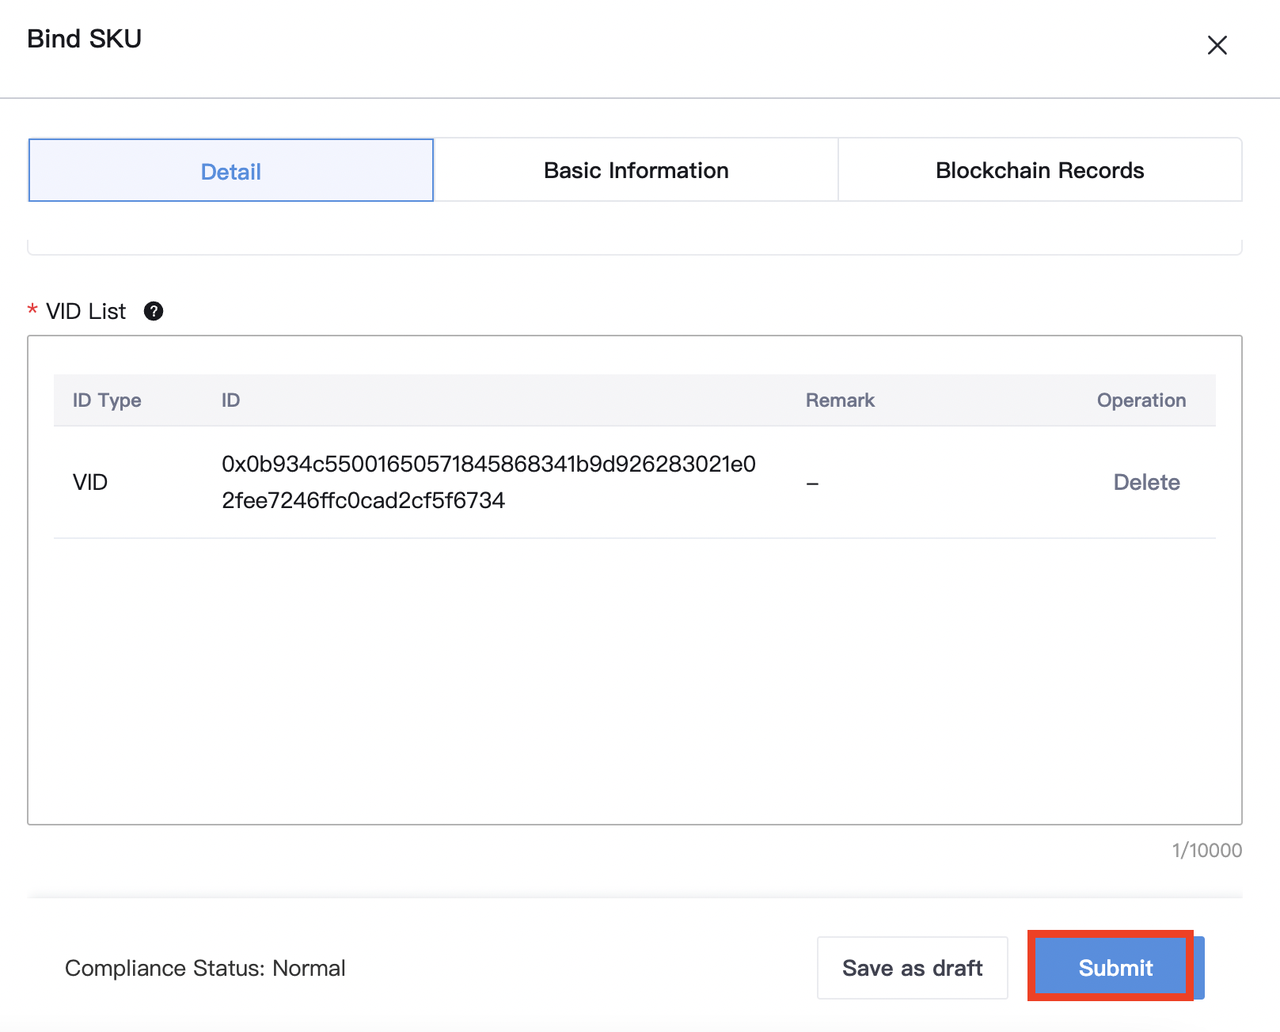

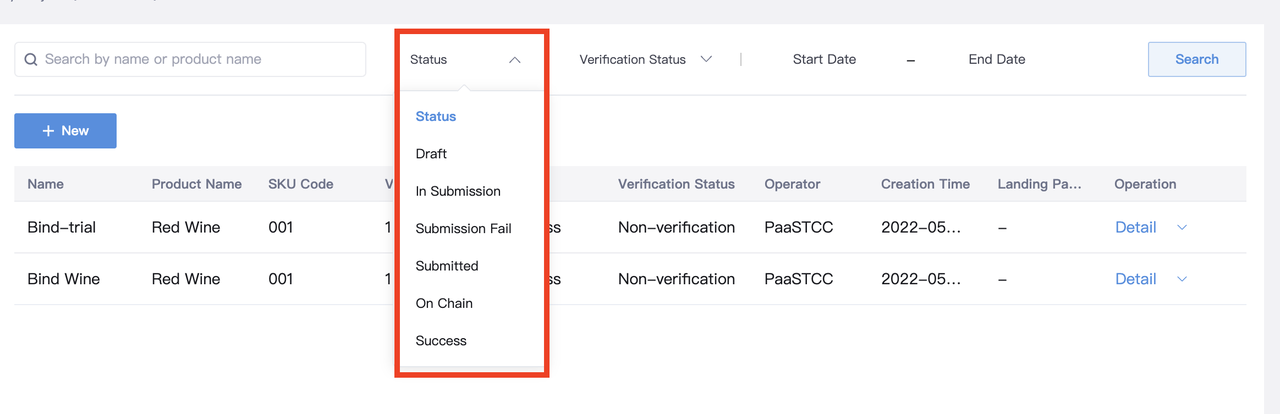
To view Bind SKU history: Enter the Bind SKU page, you can view the binding history of all SKUs, you can also filter by SKU status, verification status, start date and end date.
- View
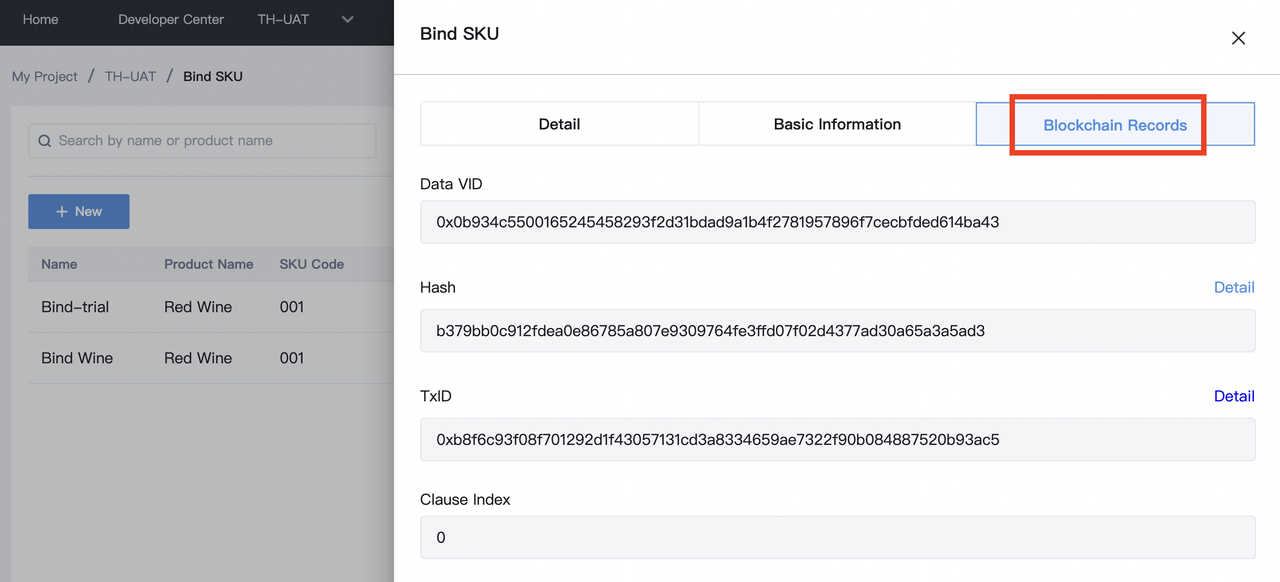
If you want to check the basic information and blockchain records of this data, click <Details>.

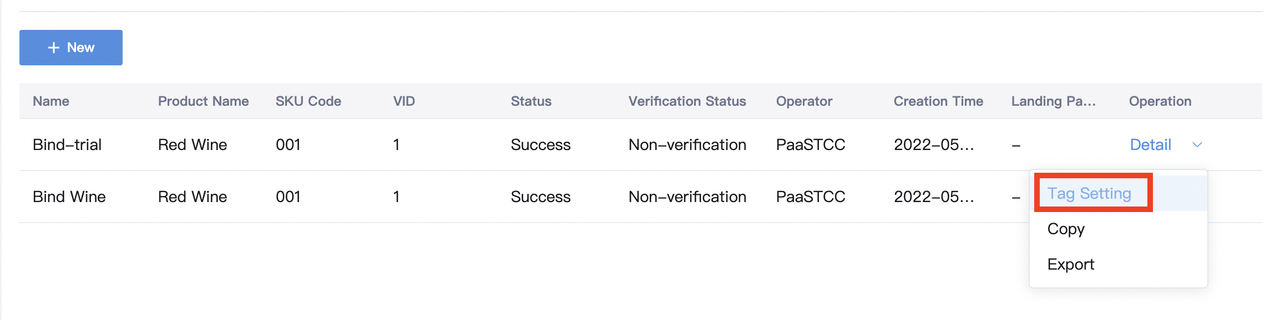
- Setting
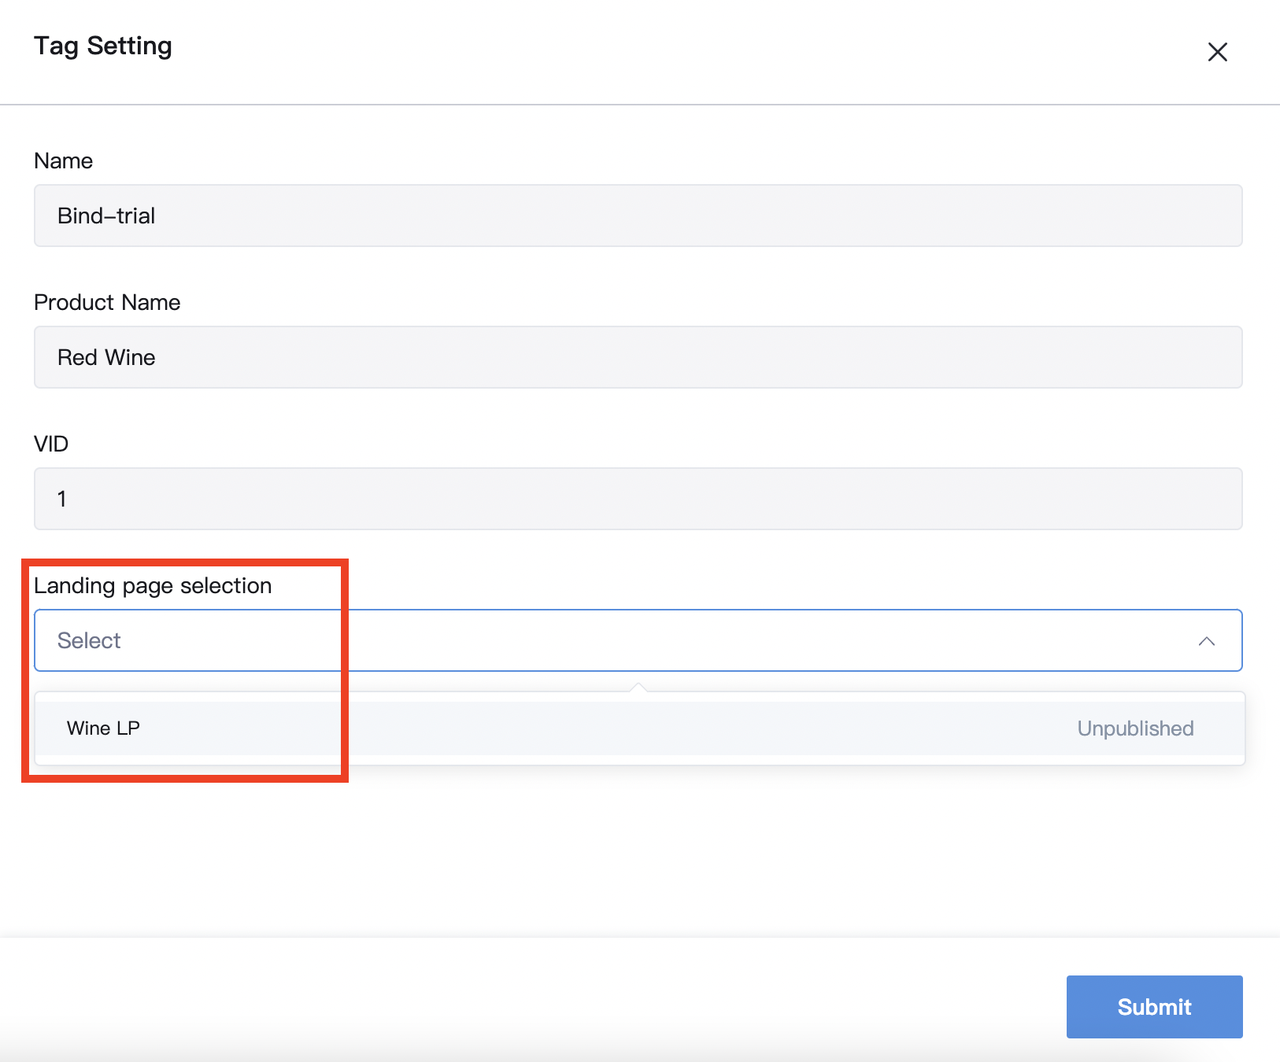
Click <Tag Setting> - <Landing Page Selection>, you can configure the landing page for SKUs that are bound with VID tags.
Note: You need to create landing pages under <Landing Page List>first.
- Export
Export [Bind SKU] data: In Bind SKU web interface, click [Export Product VID] to get the VID list for QR code printing.
After confirming that the export information is correct, click OK to export.
The data exported can be found in the [Task Center].
- Customize display information
<Customized display information> is an additional marketing opportunity section on the consumer landing page. Go to <Customized display information> to upload marketing and brand assets to show to your consumers. Select the SKUs that need customized information.
Select the SKU you want to add information to, and make sure you fill in all required fields marked with "*".
You can only upload jpg/png images within 10MB, and MP4 videos within 30MB. You can add or delete the images, videos, and websites.
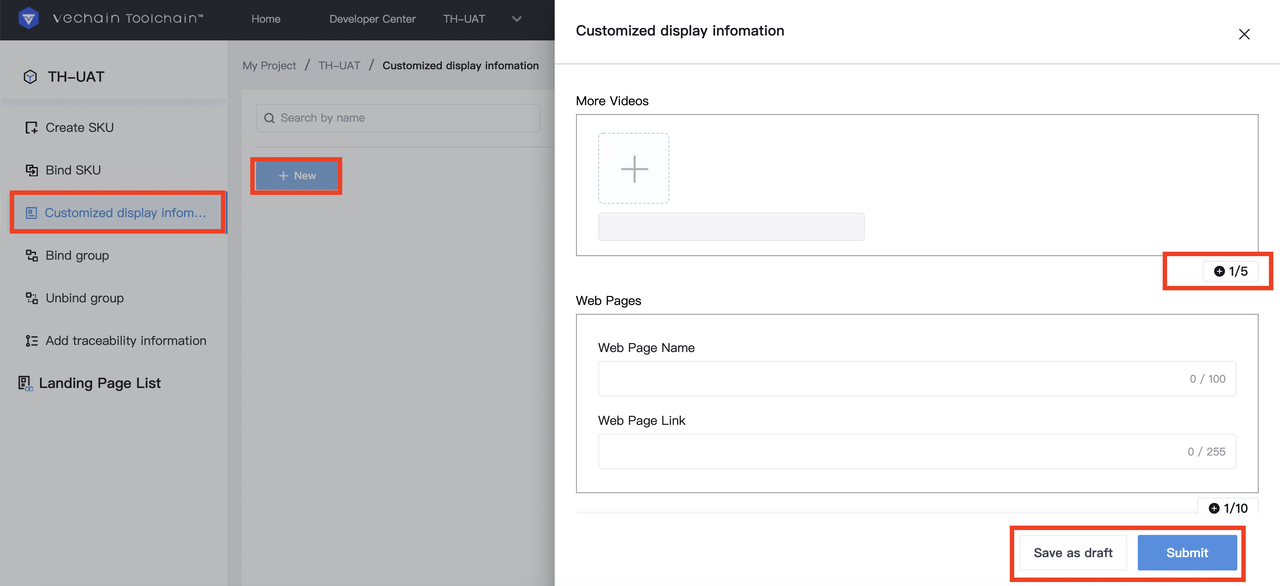
The new page can be saved as a draft and be edited later.
After filling in all the information, click <Submit>.
- Bind Group
During the logistics and delivery process, there will be occasions where many products are packed into a unit or many collections of boxes are packed into a vehicle. Take a dozen bottles of wine as an example. When these bottles are packed into one box, you can use <Bind group> to bind the bottle VIDs with the box VID, so that later in the delivery process, you only need to scan the box VID, instead of scanning all the bottles. Data collected through the box VID (Parent VID) will be automatically synchronized to the bottle VIDs (Sub VID). Please note: The Parent VID cannot be bound to an SKU.
Bind Group can be done via the web portal or the mobile app. The following instructions show how to Bind Group through the web portal:
Click <Bind Group> - <New>, enter name, e.g. box/tray/truck. After the Parent VID and Sub VIDs are added, click <Submit>.
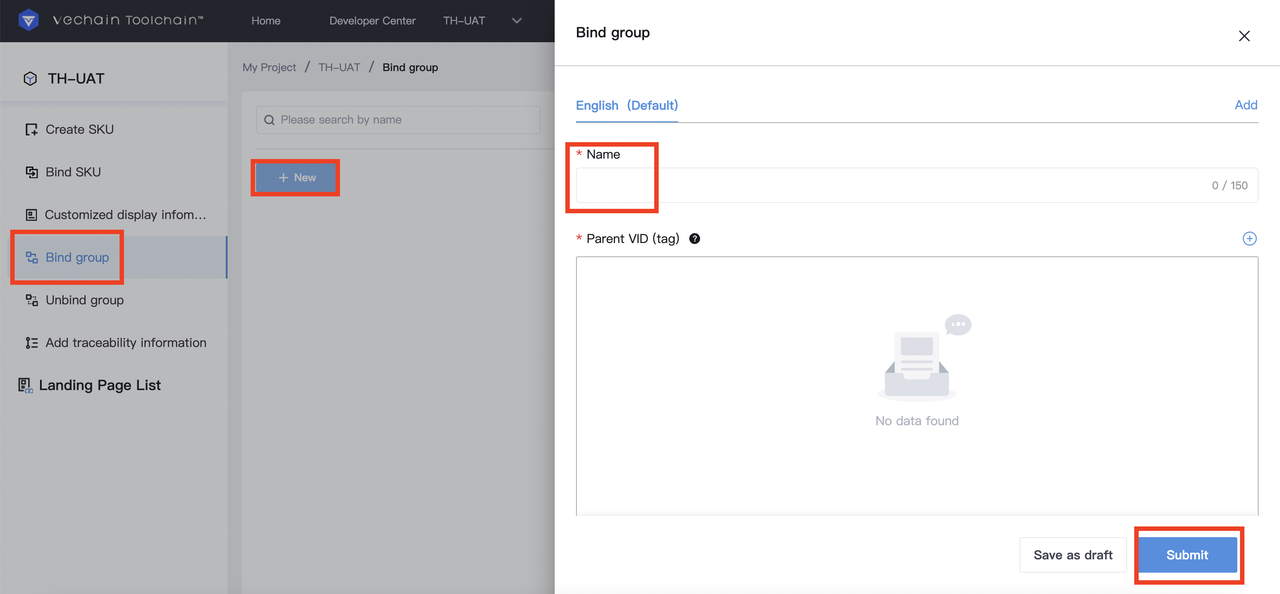
Add a Parent VID in an existing order, then select other VIDs to bind with it as Sub VIDs. You can also bind by entering the VID directly.

Check your Bind Group data: after a successful submission, wait for the system to write it on the Blockchain. When the status of the Bind Group data becomes "Success" (as shown below), it means the binding is complete. You can click <Details> to view the Basic Information and Blockchain Record.
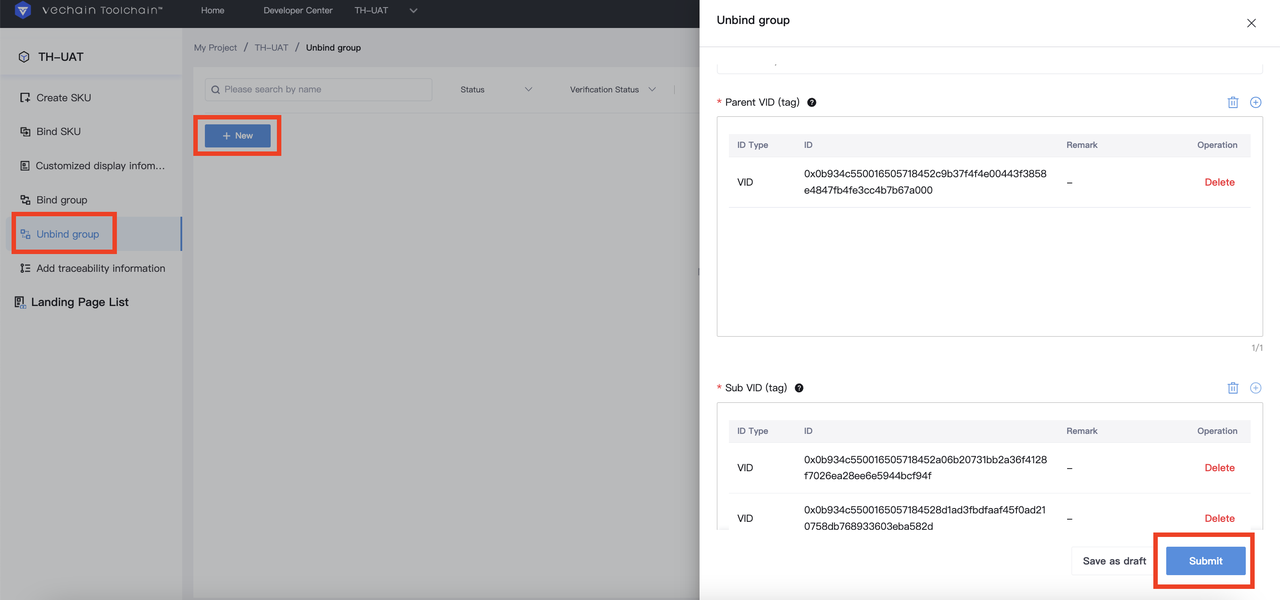
- Unbind Group
Please make sure you have completed the unbinding appropriately before the next user accidentally updates incorrect traceability information to the group of VIDs. It’s irreversible in terms of data upload and TCC consumption. You can unbind groups via My Projects or ToolChain Work App.
Instructions for how to unbind groups via Workspace are as follows:
Click <Unbind Group> - enter the name of the group and select the bound Parent VID and Sub VIDs - click <Confirm>
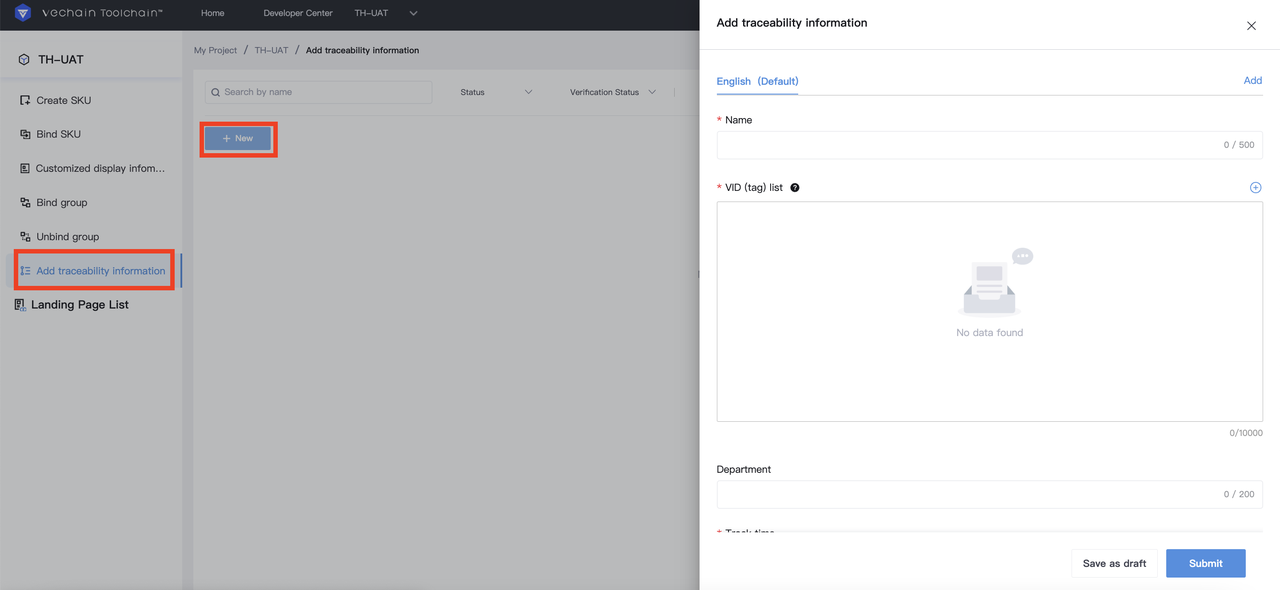
- Traceability Information
You can create traceability information via <My Projects> and on the mobile app . The following instructions demonstrate how to create traceability information through the web side.
Create new traceability information:
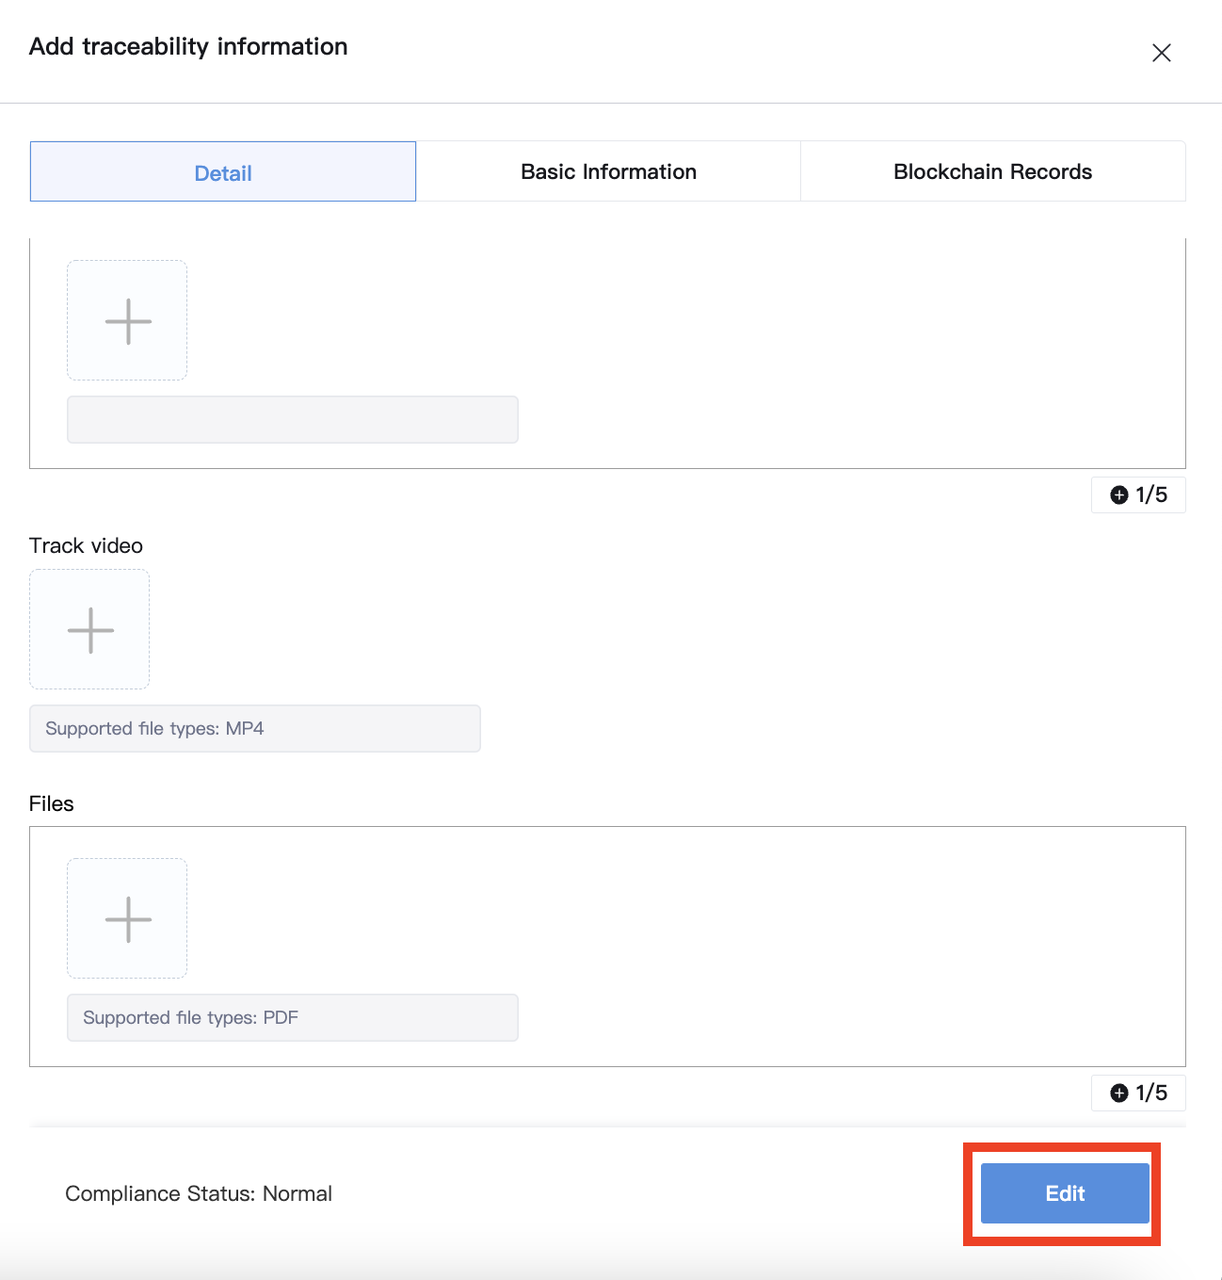
Click <Add traceability information> - <New> to fill in the name of this traceability step -> Add the VIDs to be traced -> choose the responsible department -> set track time, location, image, video and other files. (As shown below)
View traceability information:
After you fill in the display information, click <Confirm>. Once the status reads “Success”, the new traceability information is uploaded onto the blockchain. You can see all the details in <Details>.
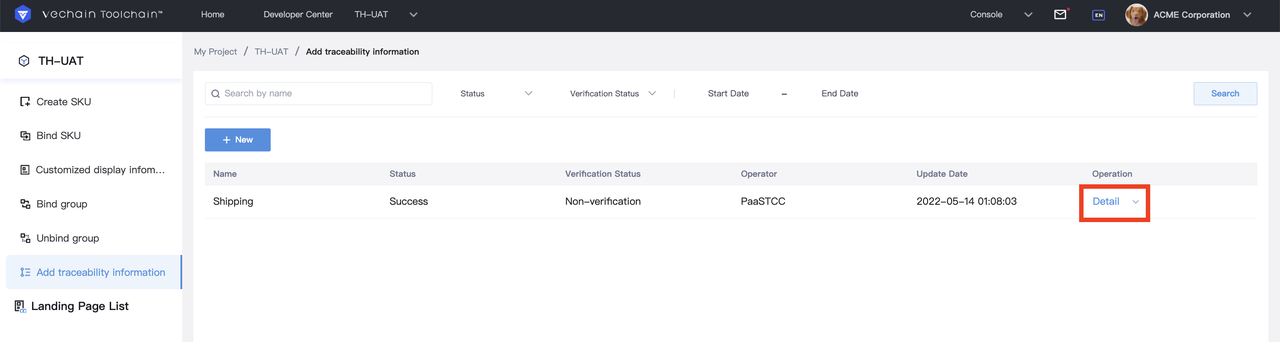
Update traceability information:
After the traceability information is on chain, click <Detail> to enter the details page, click <Edit> to update or modify, as shown below. Click [Submit] to resubmit the modified traceability information.
- Landing Page List
The landing page is where your end users will see the various DCP that you’ve chosen to share with them. (This is usually a mobile landing page that is shared with consumers who scan a QR code.)
Under <Landing Page List>, you can set up and preview the landing page format. You can select an SKU to be displayed in this format, and set the activation time for your landing page.
Create a new landing page:
Click <New>, fill in the landing page name and select an SKU.
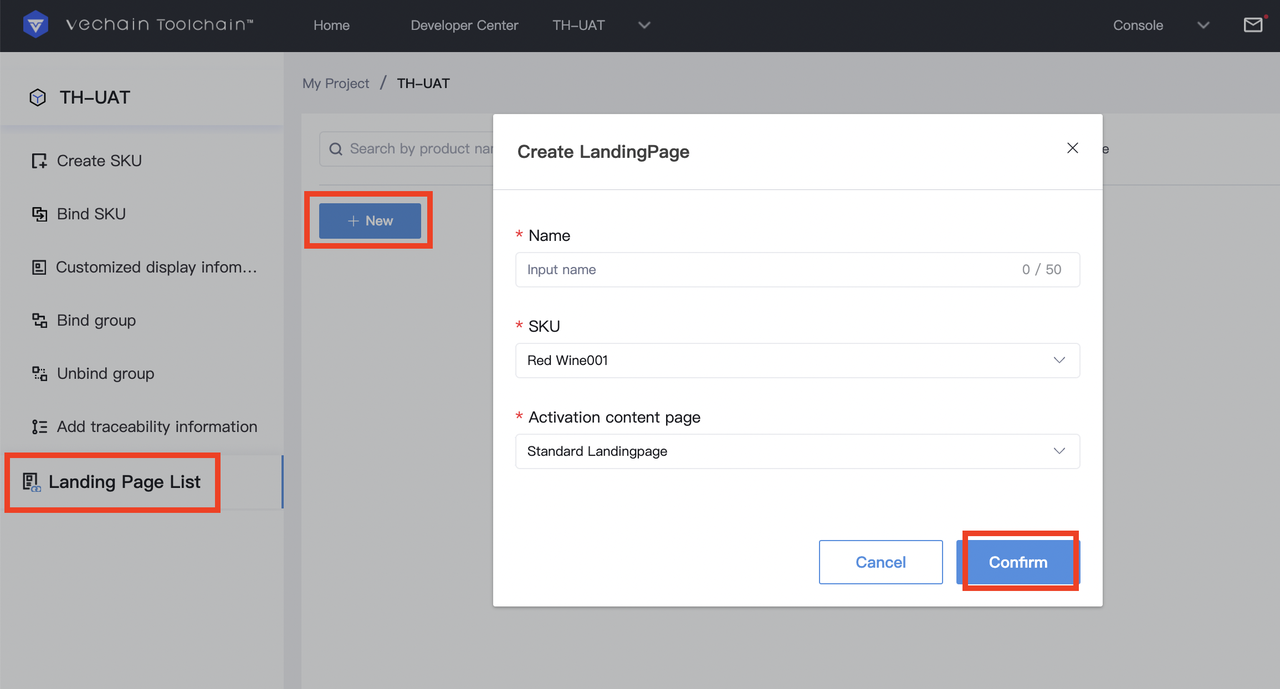
Click <Confirm> and you will be taken to the landing page setup page. You can configure the information and data that you want to display to your end consumers.
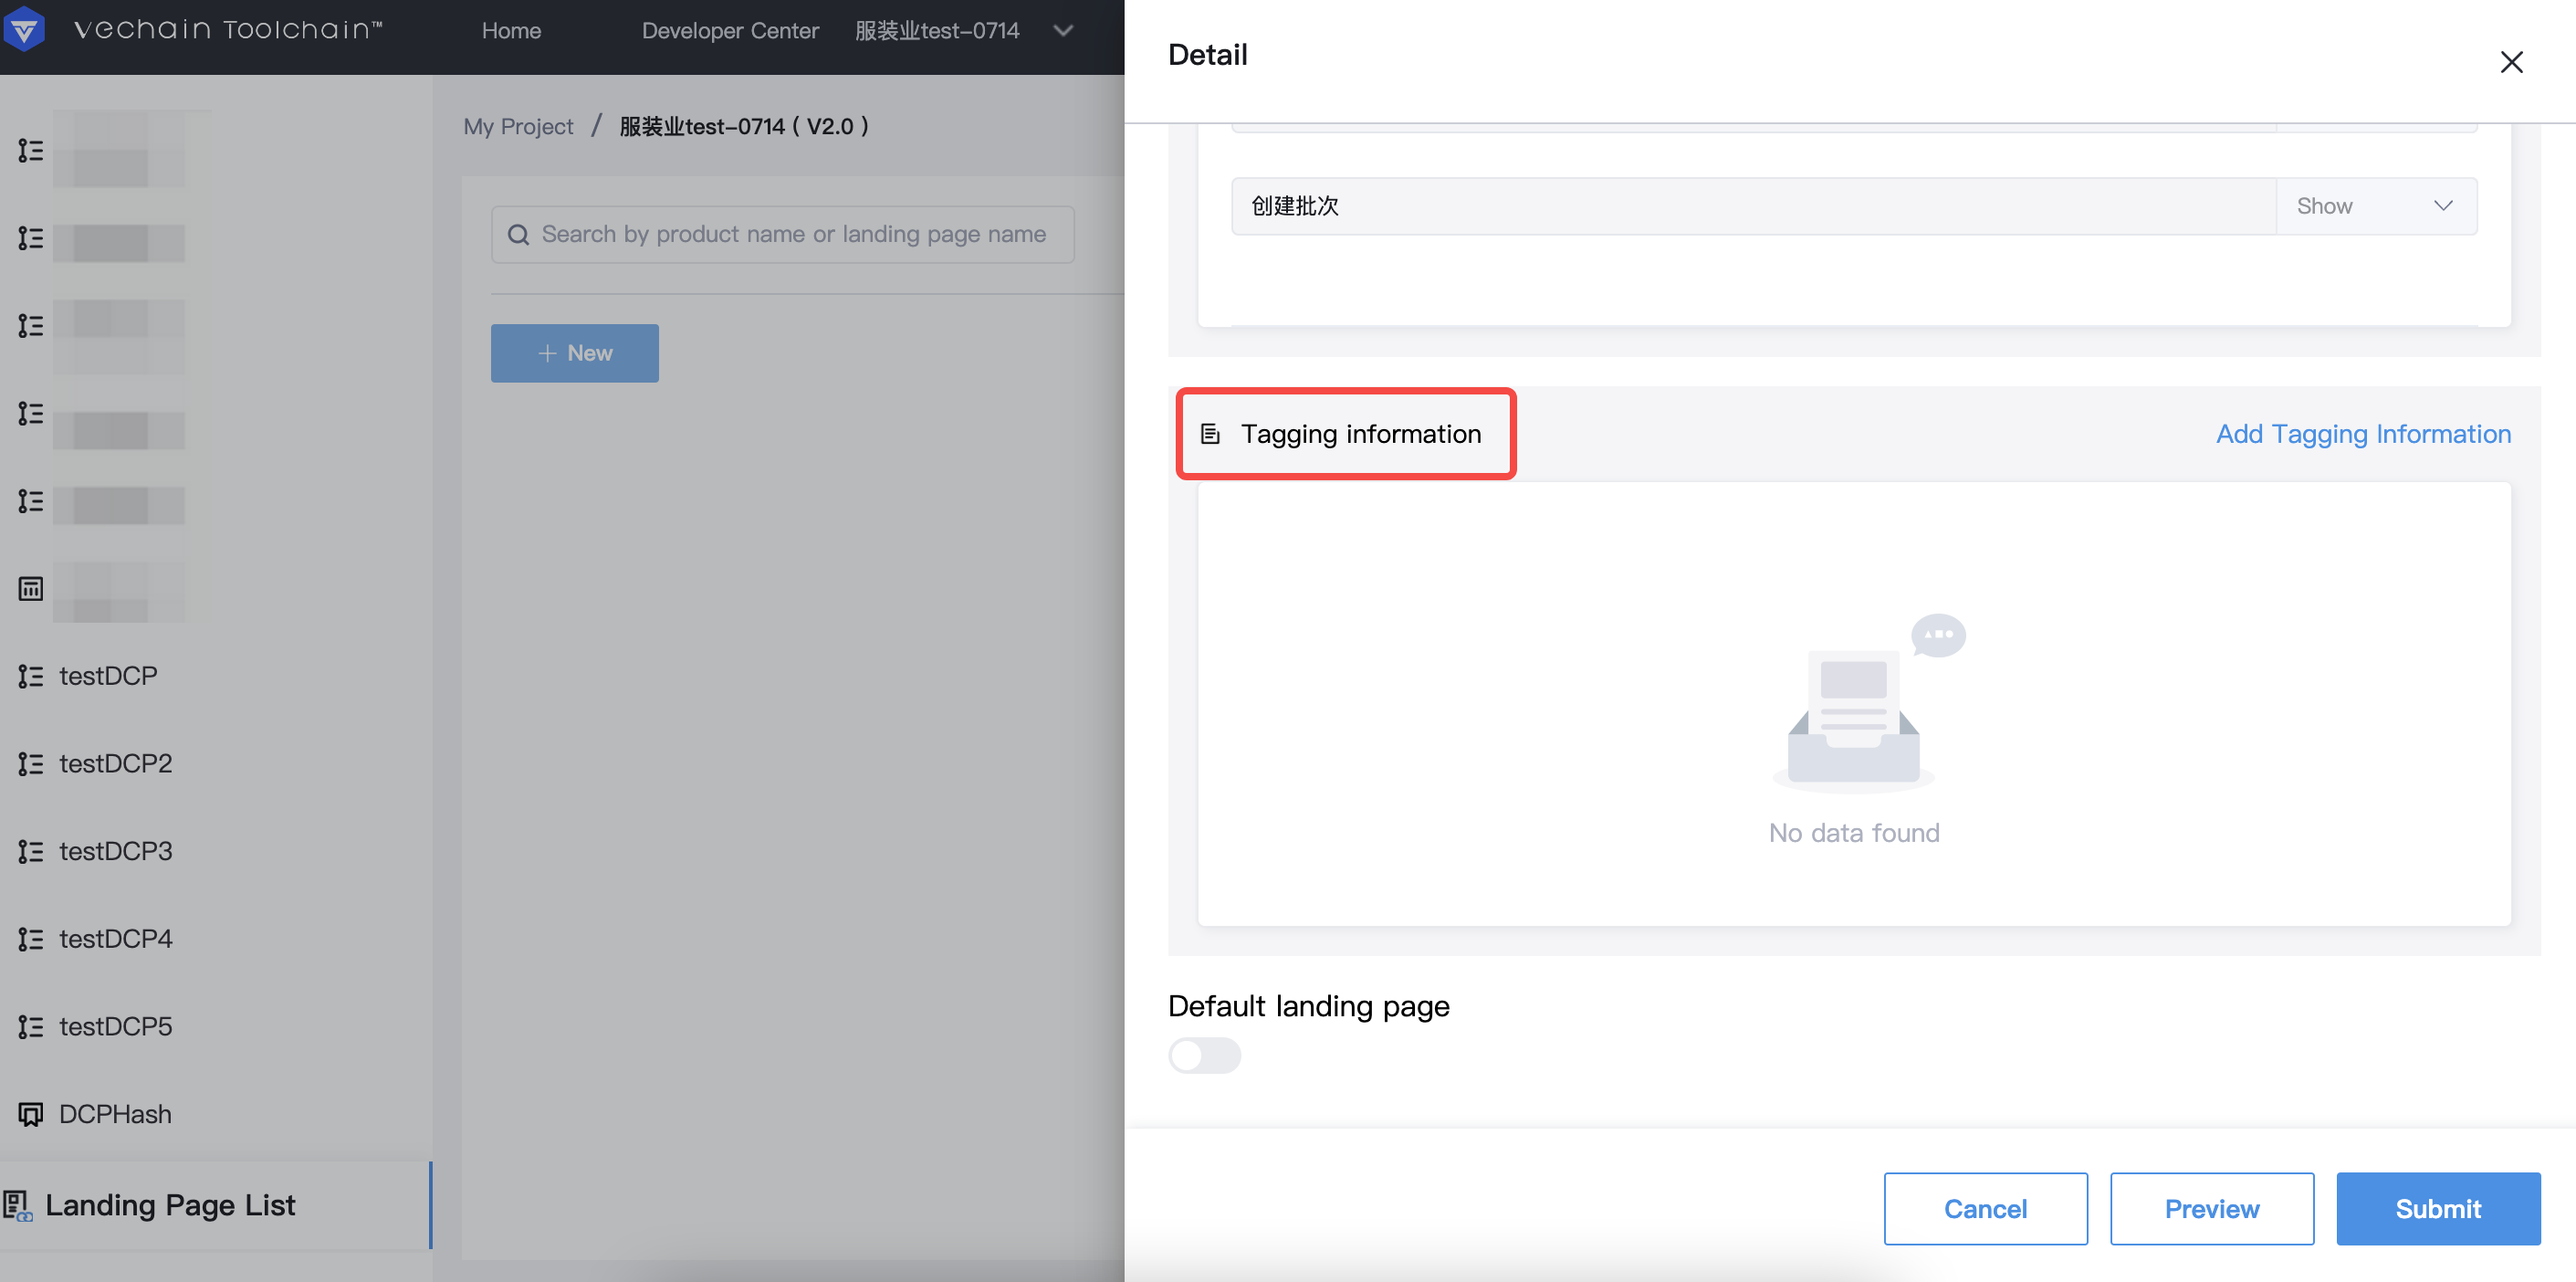
Under <Tagging Information>, bind the VIDs to display them in this format.
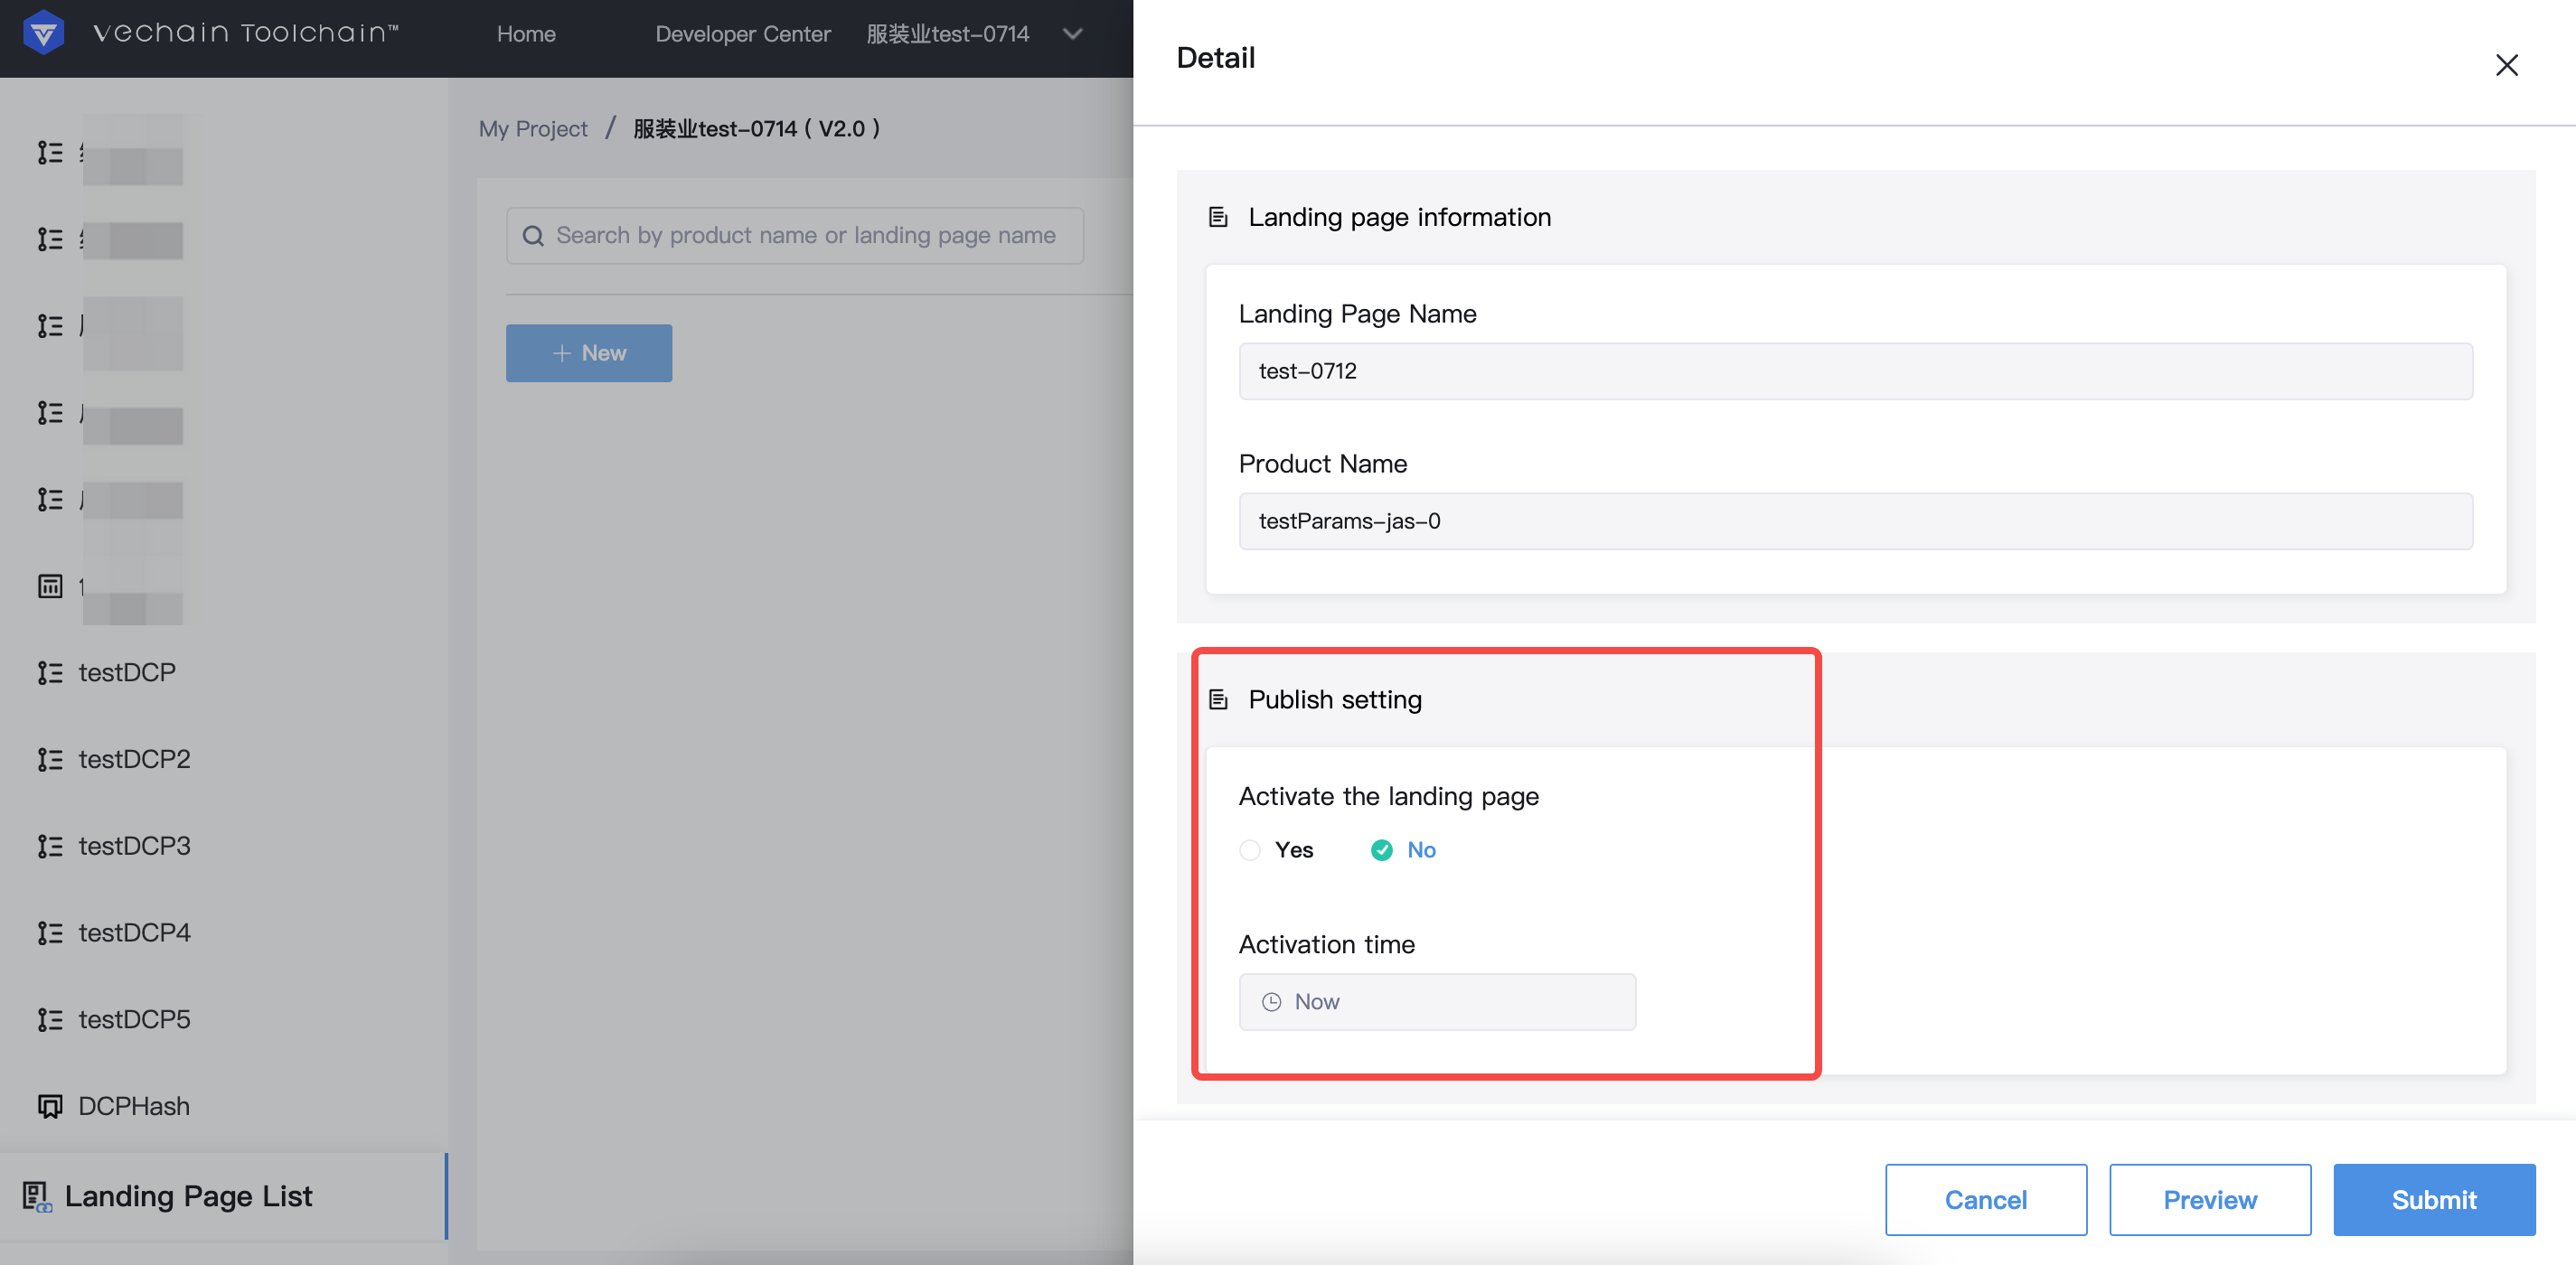
Under <Publish Setting>, choose “Yes” to make the QR code scannable to end-consumers and allow them to see your landing page.
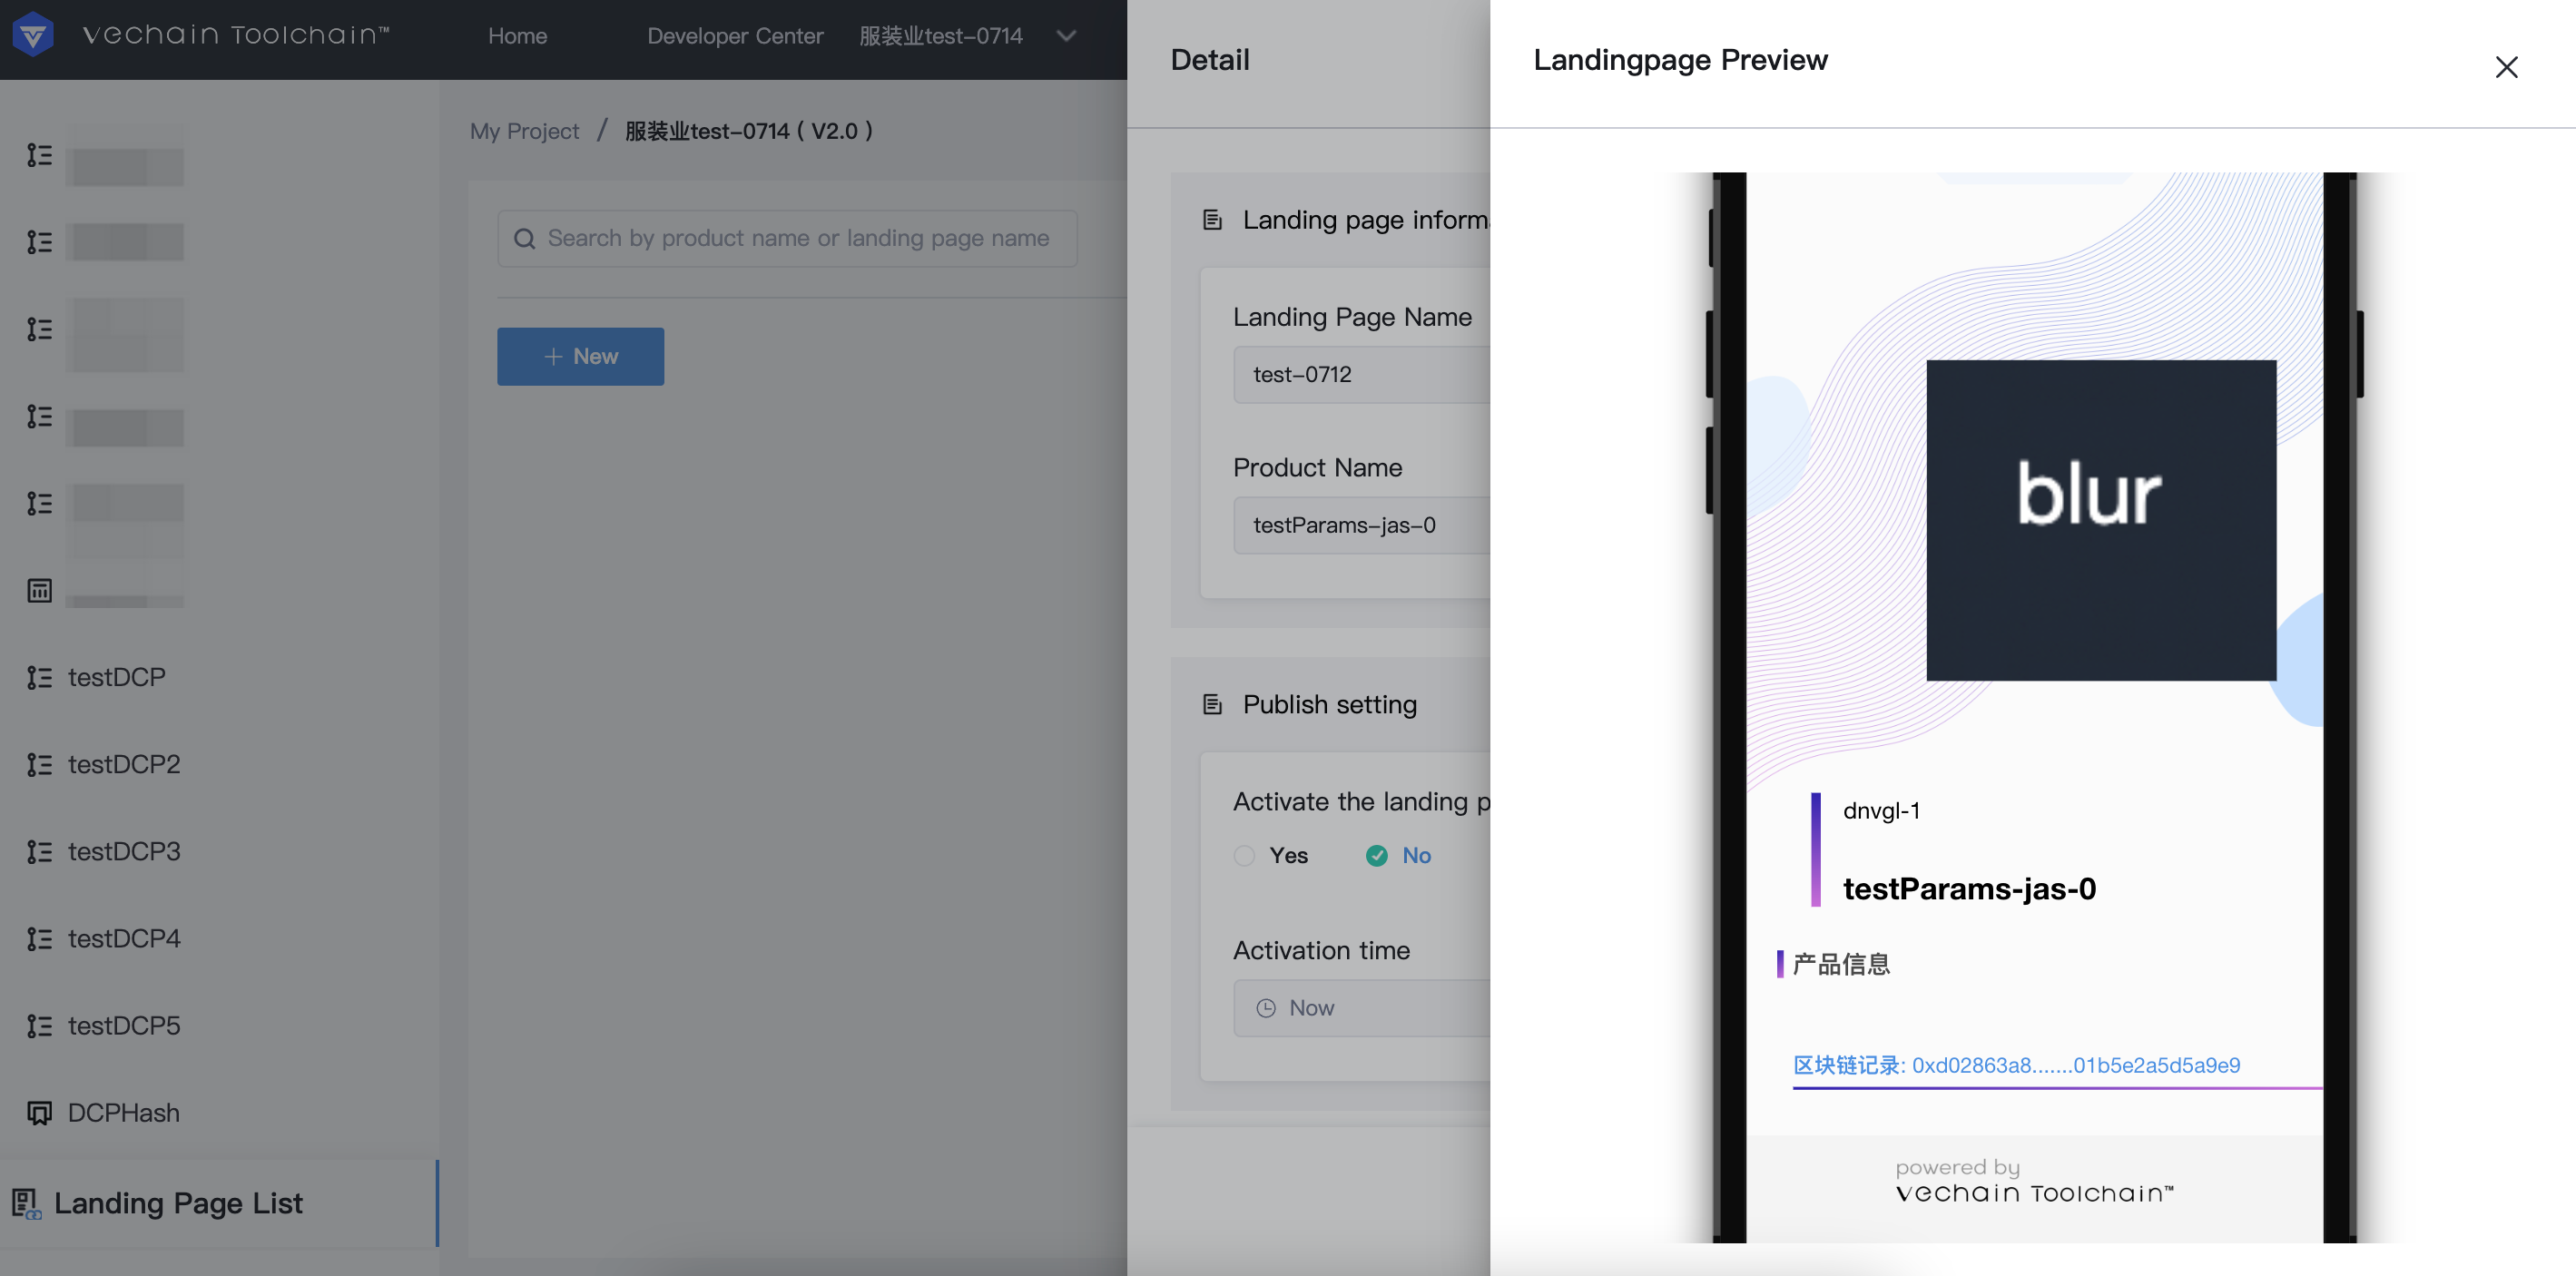
Preview the landing page:
After you finish setting up a landing page, click <Preview> to preview the end result in mobile layout.
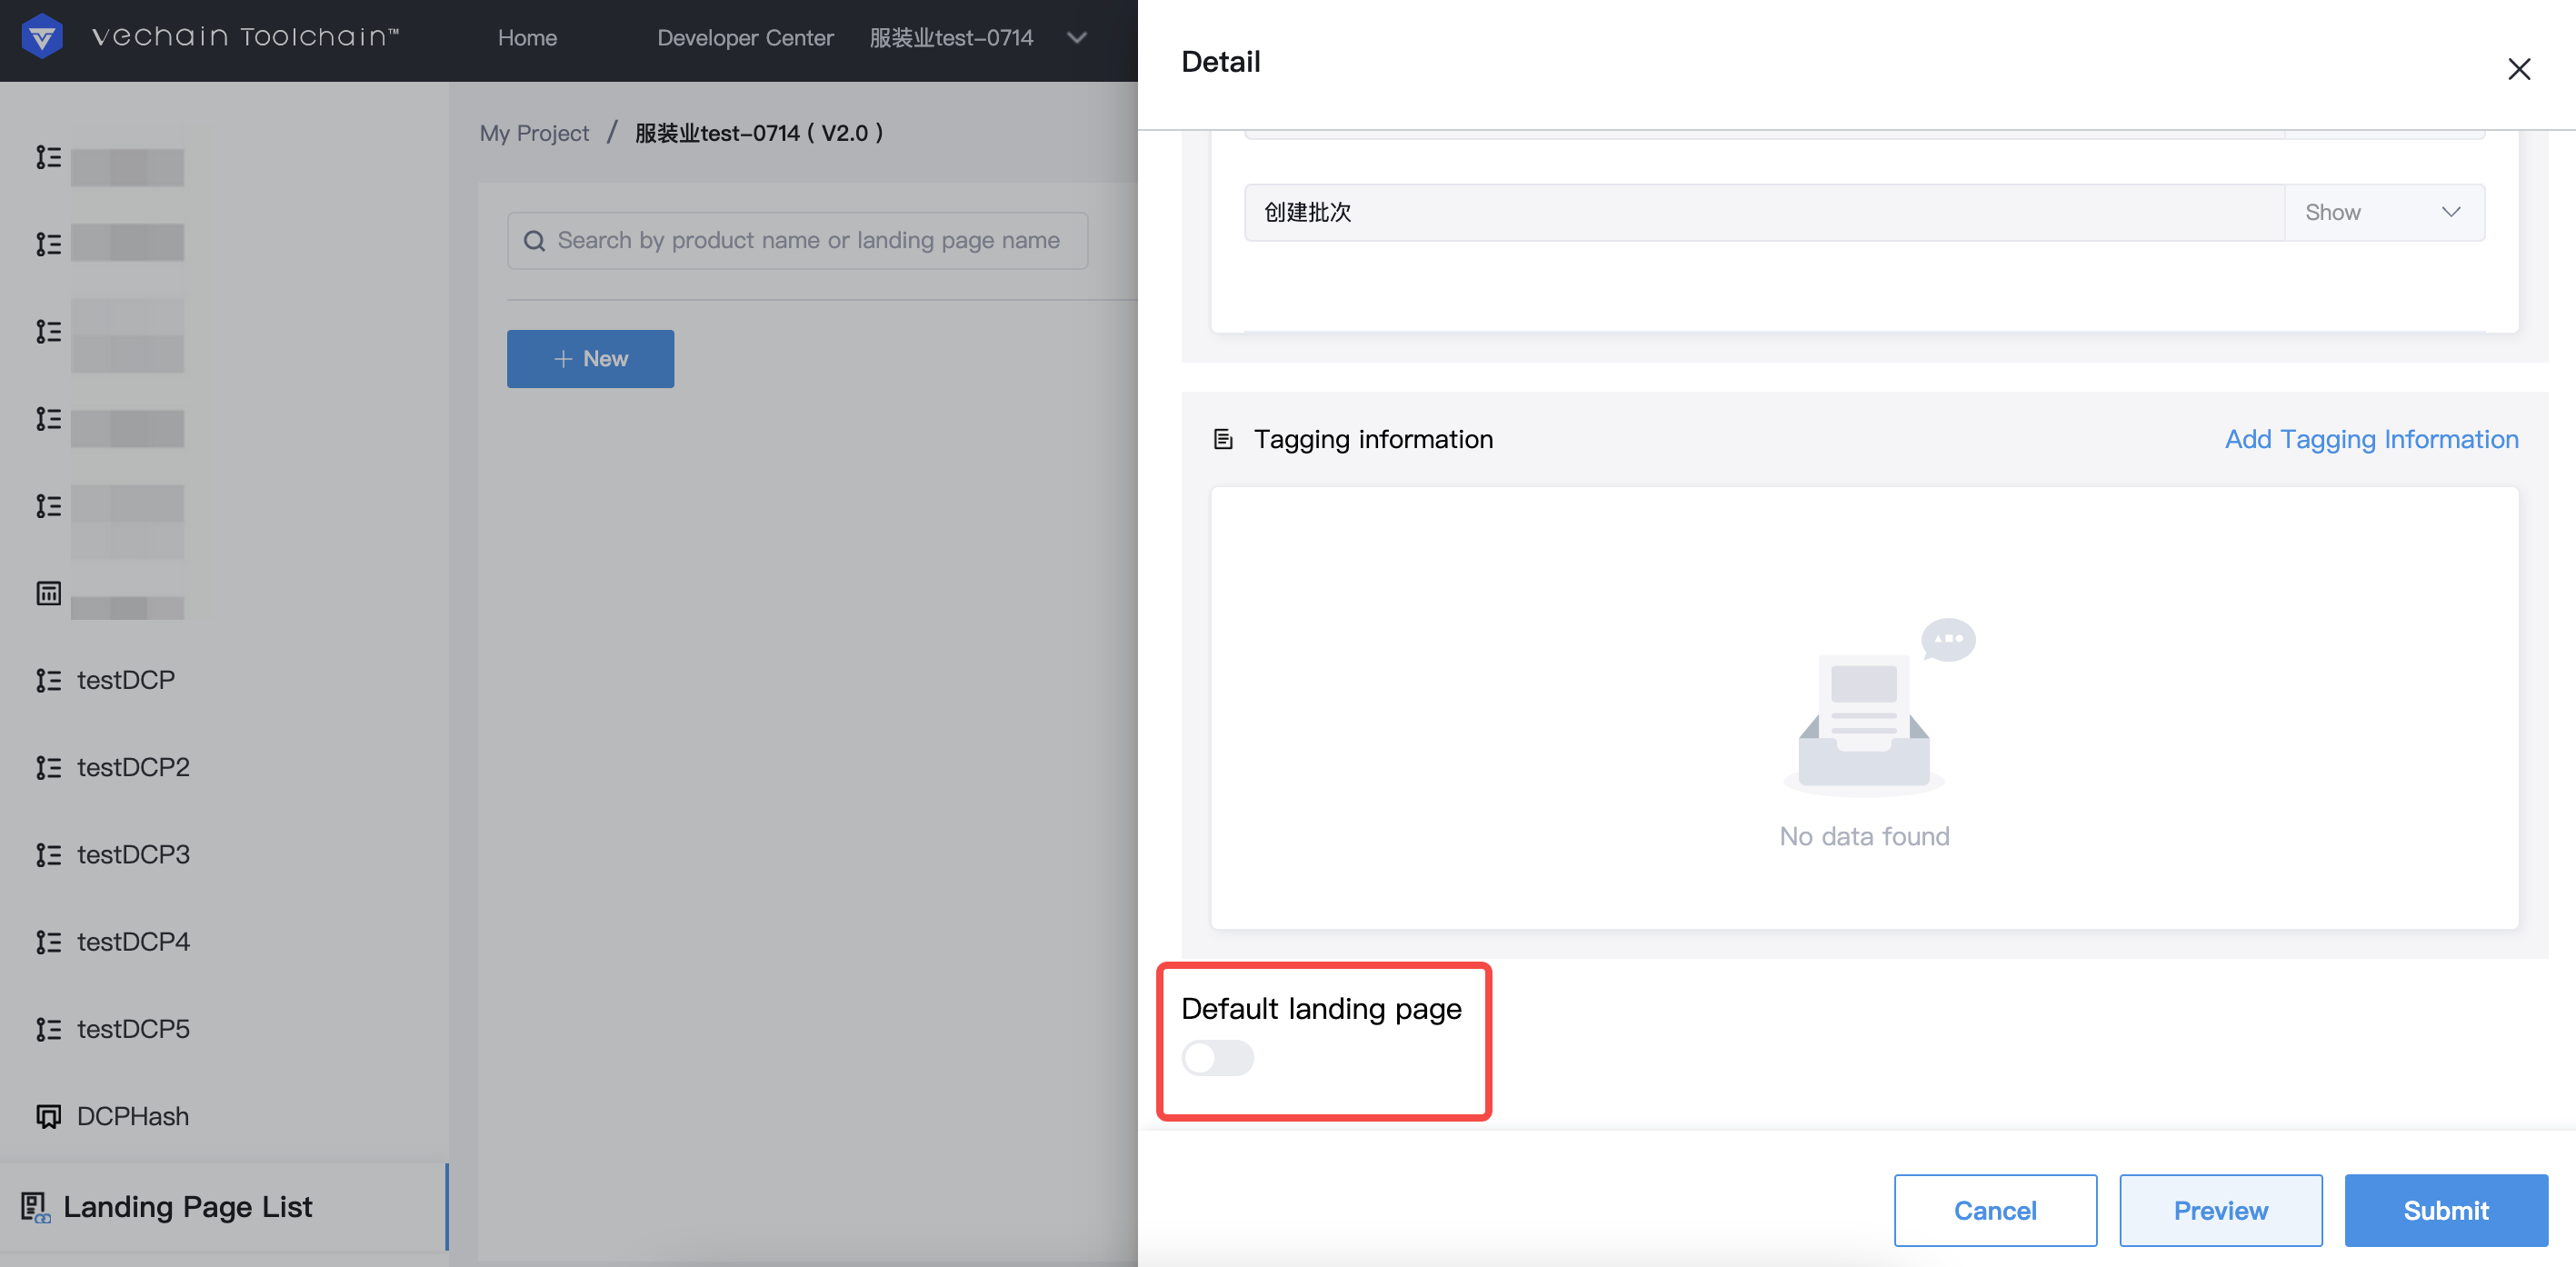
<Default landing page>: checking this box allows you to set the landing page as default for the SKU. If you have multiple different landing pages you’d like to apply to different product SKUs, create multiple landing pages accordingly.
Comments
0 comments
Please sign in to leave a comment.